[ExpertPhotography is supported by readers. Product links on ExpertPhotography are referral links. If you use one of these and buy something, we make a little bit of money. Need more info? See how it all works here.]
What Is Photography Bracketing
Bracketing means creating several photos with different settings between the brackets. Exposure bracketing is when a photographer creates pictures with different exposure settings. The purpose of this is to cover more of the dynamic range. Bracketed photos are used later to create an HDR (high dynamic range) photo. Some other bracketing techniques include white balance bracketing or focus bracketing. The former is not required if you shoot raw. The latter is a great technique used for focus stacking. This increases depth of field. We’ll touch upon this later in the article.
Why We Need Exposure Bracketing
The first issue a newbie landscape photographer has to overcome is this. A scene looks pretty. But a photo of that scene comes out with a white sky and black foreground. Modern cameras are good at determining the right exposure compensation for each shot. But the technology isn’t as advanced as our eyes are. What the camera sees as the correct exposure value isn’t always right. When we look at a scene with high contrast, our eyes adjust quickly. They make their “aperture” wider or narrower. Cameras don’t work the same way. You have only one set of settings to capture it. The exposure bracketing technique is a way to overcome this limitation. It allows you to capture the same scene multiple times with different settings to blend later. When some people hear the term “HDR photo”, they freak out because the term has been abused and overused. An HDR photo done right looks natural and pleasing to the eye. That’s when we need the exposure bracketing.
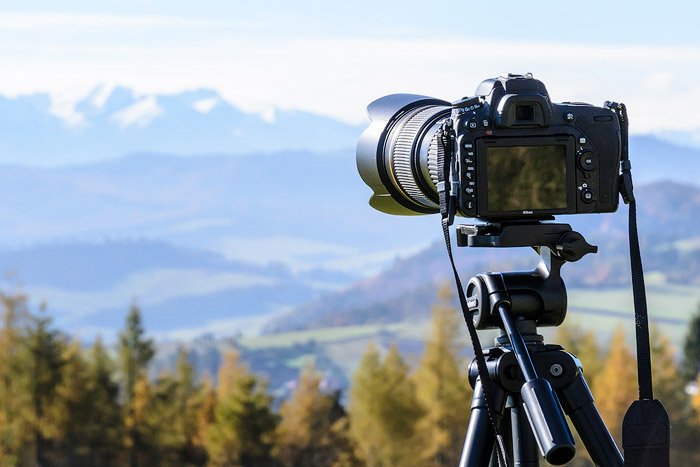
How to Bracket Photos for HDR
First things first – an essential tool for any type of bracketing is a tripod. Sometimes you can get away with handheld shots, but it’s risky and can result in a disappointment. The general plan is to: If it’s windy and you have moving objects (trees), raise your ISO. Then set the camera to series mode rather than delayed shooting mode. You can then do the series by pressing the button for a longer time.
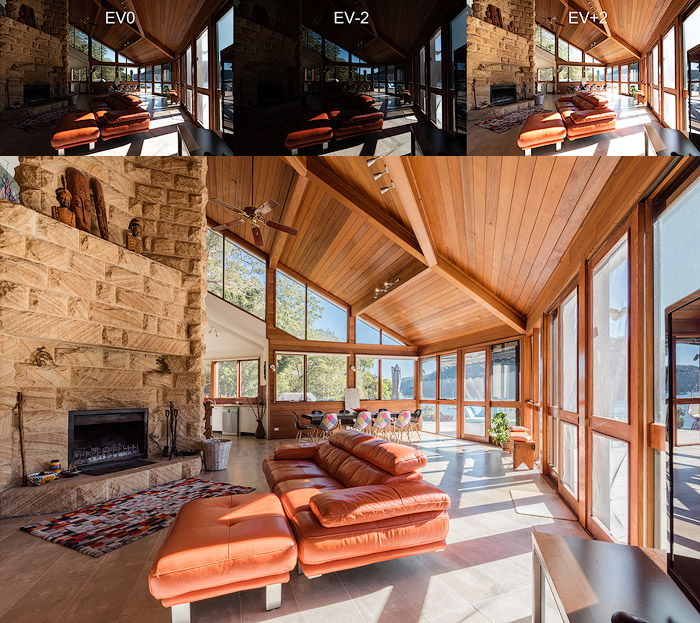
EV Exposure Settings
The big questions here are – how many brackets and how big is the distance between them when it comes to EV? Let’s discuss. EV value determines an exposure compensation and is a term used for bracketing. So, EV0 is the exposure your camera would pick automatically. EV-1 means its exposure is “minus one stop”. One stop equals the double or half amount of light the camera receives. So, EV-1 halves the amount of light. EV+1 doubles the amount of light. Modern cameras are advanced with high dynamic range. Because of this, I see no need to create brackets with just one stop between them. There are three types of bracketing settings that I use: You can have three stops between the brackets, but it makes it harder to blend. If you feel the need to have three stops, it may be a better choice to do three brackets instead.
Merging Bracketed Images Into HDR
There are many applications that allow us to merge bracketed images into a single HDR. They all have their pros and cons. It boils down to some personal preference and what works well for your existing workflow.
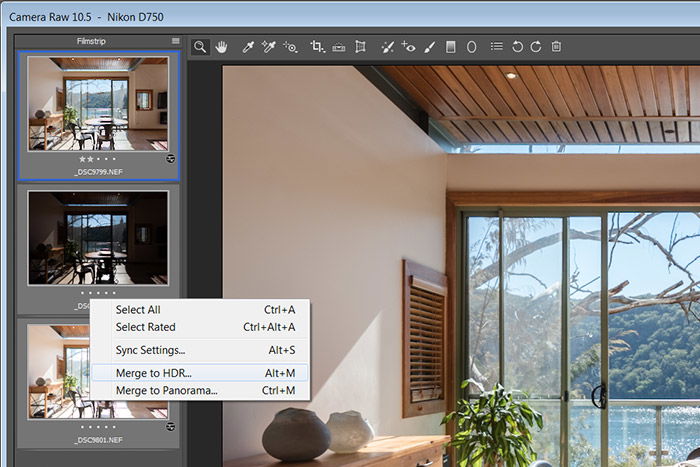
ACR/Lightroom
The most common tools photographers use for editing are Lightroom and Photoshop. Both software can merge frames into a single picture. You need to select the brackets, right click and then choose Merge to HDR, wait a bit, and that’s it. There are a few important things to know. Your photos may have moving objects, like trees or waves, making it harder to merge. In this case, try a de-ghosting option these tools provide. It will think a bit more and try to get rid of all object movements. Set the amount of de-ghosting depending on the scene. Typically, low or medium work well enough. To check, zoom in to the part with the moving objects and see if it has any artifacts. More often than not, it does a satisfactory job both merging and de-ghosting. I always use Photoshop with built-in ACR (Adobe Camera Raw) for all my editing including HDR merging.
Photoshop
In case you are editing JPEG, not raw, there is still the option to use Photoshop. There are three simple steps:
Photomatix, Aurora HDR, Enfuse
There are lots of applications, and it makes no sense to cover all of them here. I’ll just mention the most popular ones. These are Photomatix, Aurora HDR and Enfuse. Photomatix is the app responsible for HDR’s bad rep. People overused it so badly that it’s quite common to think Photomatix is bad and amateurish. That is wrong. A photographer should use it carefully and do as little tone mapping as possible. Moderation is key. Otherwise, the colors start looking like nuclear pollution waste. Aurora HDR is a great app, with a lot of tools similar to the ACR and Lightroom. It does a good job merging the photos, and I managed to get similar results. It may work slightly better than Adobe programs. But the difference is not big enough for me to change the workflow. Enfuse is a Lightroom plugin that uses some different algorithm to merge the photos. I’ve seen people achieving great results with it. But again, it complicates the workflow.
Manual Merging With Luminosity Masks
You can create HDRs through manual merging by using luminosity masks. This is the most advanced technique. It’s not an easy one to master and it requires a lot of practice. The general idea is to generate masks using the luminosity values of the image. You can apply the changes only to the lights or only to the darks of the image. The drawbacks are the editing time and the learning curve.
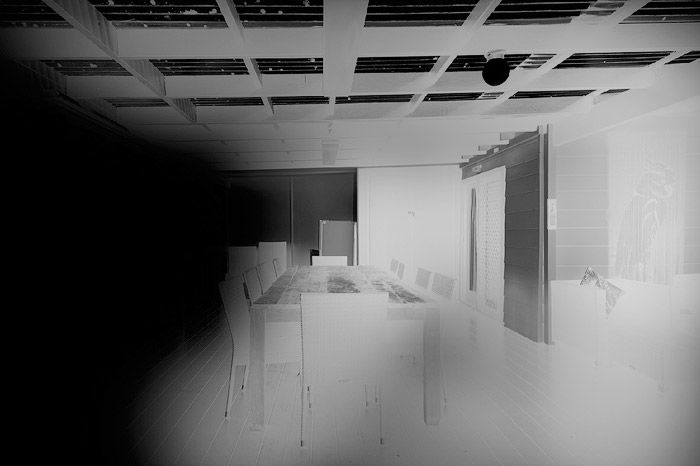
Single Exposure HDR
Modern cameras have quite a large dynamic range. Sometimes you don’t even need two brackets to edit a photo. You can use a single shot and convert it twice with different settings. For instance, you have an image with very high contrast. You open it in the raw converter, edit it for the darks, open in Photoshop. Then open the raw file a second time, edit it for the lights and open again. This way, you now have bright and dark images in the Photoshop. Now you can either create an HDR using Photoshop merge or do it manually.
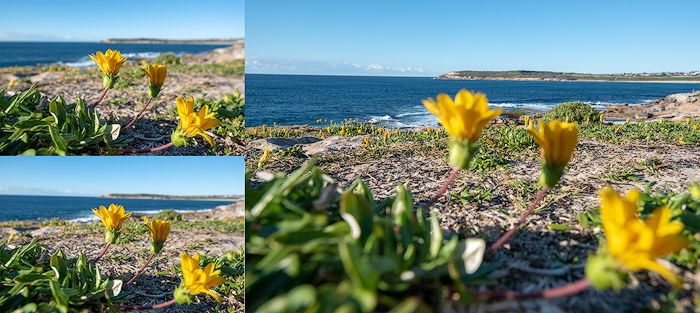
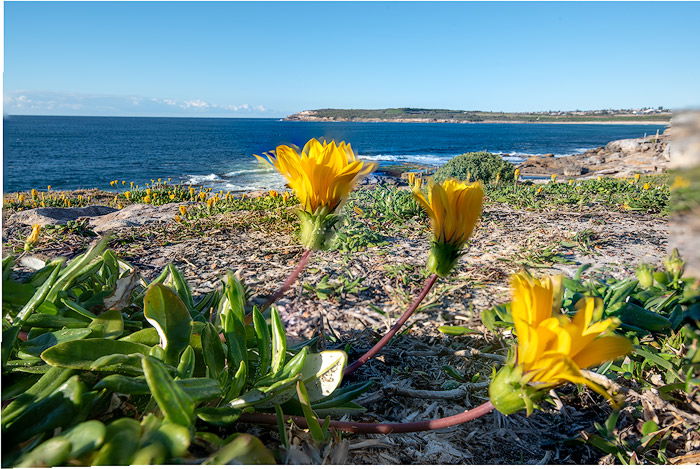
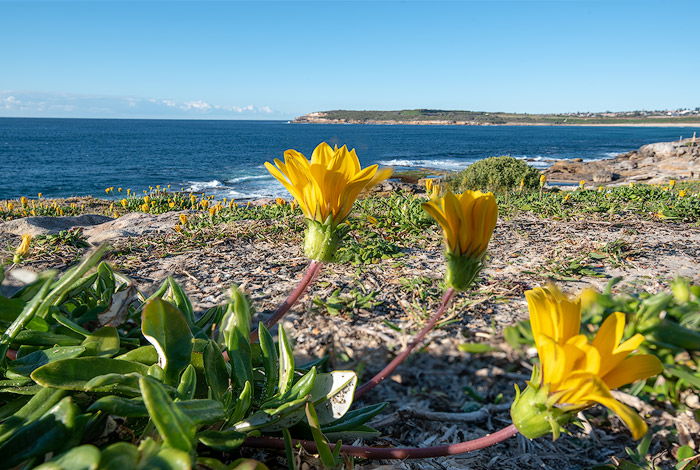
Focus Bracketing
Another type of bracketing is focus bracketing. Sometimes, the photo needs to have a wider depth of field than any aperture setting can provide. In this case, we make brackets with different focus points and then blend them together. To create bracketed images for focus stacking: The takeaway here is that you have no way of bracketing automatically with your digital cameras. Changing the focus involves some manual labour.
Focus Stacking Images
Here’s how to blend focus stacking in Photoshop. The script is very similar to the one we had for the other Photoshop blend. I found their algorithm a bit less reliable than for the HDR. More often than not, you’ll need to fix the masking manually using a soft brush. The alternative for this kind of merge is manual masking. You’ll still need to Auto-Align frames and then carefully blend them together with a soft brush with 10% opacity. Do it slowly stroke by stroke rather than one single hit with 100% opacity. This way, you’ll achieve a seamless blend.
Conclusion
Modern cameras are great devices, and the technology has gone far. But they are still not perfect, and I doubt they’ll ever match the level of our eyes. All different types of bracketing help us overcome these technical limitations. Use HDR blending instead of filters. And use focus stacking to get everything in focus like it should be for the landscape photography.


title: “What Is Bracketing And How To Use It In Hdr Photography” ShowToc: true date: “2023-02-22” author: “Tana Rodgers”
[ExpertPhotography is supported by readers. Product links on ExpertPhotography are referral links. If you use one of these and buy something, we make a little bit of money. Need more info? See how it all works here.]
What Is Photography Bracketing
Bracketing means creating several photos with different settings between the brackets. Exposure bracketing is when a photographer creates pictures with different exposure settings. The purpose of this is to cover more of the dynamic range. Bracketed photos are used later to create an HDR (high dynamic range) photo. Some other bracketing techniques include white balance bracketing or focus bracketing. The former is not required if you shoot raw. The latter is a great technique used for focus stacking. This increases depth of field. We’ll touch upon this later in the article.
Why We Need Exposure Bracketing
The first issue a newbie landscape photographer has to overcome is this. A scene looks pretty. But a photo of that scene comes out with a white sky and black foreground. Modern cameras are good at determining the right exposure compensation for each shot. But the technology isn’t as advanced as our eyes are. What the camera sees as the correct exposure value isn’t always right. When we look at a scene with high contrast, our eyes adjust quickly. They make their “aperture” wider or narrower. Cameras don’t work the same way. You have only one set of settings to capture it. The exposure bracketing technique is a way to overcome this limitation. It allows you to capture the same scene multiple times with different settings to blend later. When some people hear the term “HDR photo”, they freak out because the term has been abused and overused. An HDR photo done right looks natural and pleasing to the eye. That’s when we need the exposure bracketing.
How to Bracket Photos for HDR
First things first – an essential tool for any type of bracketing is a tripod. Sometimes you can get away with handheld shots, but it’s risky and can result in a disappointment. The general plan is to: If it’s windy and you have moving objects (trees), raise your ISO. Then set the camera to series mode rather than delayed shooting mode. You can then do the series by pressing the button for a longer time.
EV Exposure Settings
The big questions here are – how many brackets and how big is the distance between them when it comes to EV? Let’s discuss. EV value determines an exposure compensation and is a term used for bracketing. So, EV0 is the exposure your camera would pick automatically. EV-1 means its exposure is “minus one stop”. One stop equals the double or half amount of light the camera receives. So, EV-1 halves the amount of light. EV+1 doubles the amount of light. Modern cameras are advanced with high dynamic range. Because of this, I see no need to create brackets with just one stop between them. There are three types of bracketing settings that I use: You can have three stops between the brackets, but it makes it harder to blend. If you feel the need to have three stops, it may be a better choice to do three brackets instead.
Merging Bracketed Images Into HDR
There are many applications that allow us to merge bracketed images into a single HDR. They all have their pros and cons. It boils down to some personal preference and what works well for your existing workflow.
ACR/Lightroom
The most common tools photographers use for editing are Lightroom and Photoshop. Both software can merge frames into a single picture. You need to select the brackets, right click and then choose Merge to HDR, wait a bit, and that’s it. There are a few important things to know. Your photos may have moving objects, like trees or waves, making it harder to merge. In this case, try a de-ghosting option these tools provide. It will think a bit more and try to get rid of all object movements. Set the amount of de-ghosting depending on the scene. Typically, low or medium work well enough. To check, zoom in to the part with the moving objects and see if it has any artifacts. More often than not, it does a satisfactory job both merging and de-ghosting. I always use Photoshop with built-in ACR (Adobe Camera Raw) for all my editing including HDR merging.
Photoshop
In case you are editing JPEG, not raw, there is still the option to use Photoshop. There are three simple steps:
Photomatix, Aurora HDR, Enfuse
There are lots of applications, and it makes no sense to cover all of them here. I’ll just mention the most popular ones. These are Photomatix, Aurora HDR and Enfuse. Photomatix is the app responsible for HDR’s bad rep. People overused it so badly that it’s quite common to think Photomatix is bad and amateurish. That is wrong. A photographer should use it carefully and do as little tone mapping as possible. Moderation is key. Otherwise, the colors start looking like nuclear pollution waste. Aurora HDR is a great app, with a lot of tools similar to the ACR and Lightroom. It does a good job merging the photos, and I managed to get similar results. It may work slightly better than Adobe programs. But the difference is not big enough for me to change the workflow. Enfuse is a Lightroom plugin that uses some different algorithm to merge the photos. I’ve seen people achieving great results with it. But again, it complicates the workflow.
Manual Merging With Luminosity Masks
You can create HDRs through manual merging by using luminosity masks. This is the most advanced technique. It’s not an easy one to master and it requires a lot of practice. The general idea is to generate masks using the luminosity values of the image. You can apply the changes only to the lights or only to the darks of the image. The drawbacks are the editing time and the learning curve.
Single Exposure HDR
Modern cameras have quite a large dynamic range. Sometimes you don’t even need two brackets to edit a photo. You can use a single shot and convert it twice with different settings. For instance, you have an image with very high contrast. You open it in the raw converter, edit it for the darks, open in Photoshop. Then open the raw file a second time, edit it for the lights and open again. This way, you now have bright and dark images in the Photoshop. Now you can either create an HDR using Photoshop merge or do it manually.
Focus Bracketing
Another type of bracketing is focus bracketing. Sometimes, the photo needs to have a wider depth of field than any aperture setting can provide. In this case, we make brackets with different focus points and then blend them together. To create bracketed images for focus stacking: The takeaway here is that you have no way of bracketing automatically with your digital cameras. Changing the focus involves some manual labour.
Focus Stacking Images
Here’s how to blend focus stacking in Photoshop. The script is very similar to the one we had for the other Photoshop blend. I found their algorithm a bit less reliable than for the HDR. More often than not, you’ll need to fix the masking manually using a soft brush. The alternative for this kind of merge is manual masking. You’ll still need to Auto-Align frames and then carefully blend them together with a soft brush with 10% opacity. Do it slowly stroke by stroke rather than one single hit with 100% opacity. This way, you’ll achieve a seamless blend.
Conclusion
Modern cameras are great devices, and the technology has gone far. But they are still not perfect, and I doubt they’ll ever match the level of our eyes. All different types of bracketing help us overcome these technical limitations. Use HDR blending instead of filters. And use focus stacking to get everything in focus like it should be for the landscape photography.
