The Photographer’s Ephemeris Family
The Photographer’s Ephemeris (TPE) is a very well known software developed by Crookneck Consulting LLC. and comes in different flavors:
TPE Desktop (free): a web application for your computer; TPE App available for iOS and Android: This is the classic Photographers Ephemeris desktop, enhanced and packed as mobile app; TPE 3D: the power of the classic Photographers Ephemeris combined with 3D maps, only for iOS; The Photographer’s Transit: planning tool for the interchangeable lens photographer, only for iOS.
Since the only app that is available for both iOS and Android-based devices is the Photographers Ephemeris classic, this is the app we will discuss in this article.
Photographer’s Ephemeris Interface
The Photographers Ephemeris interface is quite crowded, particularly on devices with a small screen. But once you get used to it, it is not much of a problem. The main screen is divided in 5 parts.
Using The Photographer’s Ephemeris to Plan a Photography Trip to Manarola, Italy for NYE
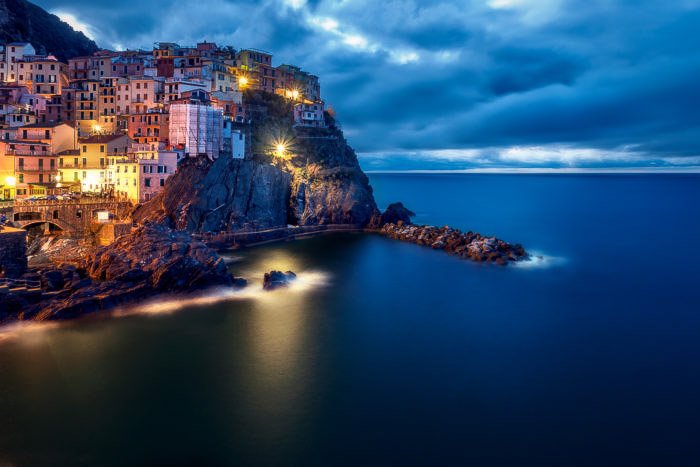
In order to illustrate the use of the Photographer’s Ephemeris to plan a trip, let’s suppose I plan to travel from Brussels to Manarola (Italy) for this New Year’s Eve. Manarola is a nice characteristic small village on the coast of Liguria, which is part of the worldwide famous Cinque Terre.
Set the Location
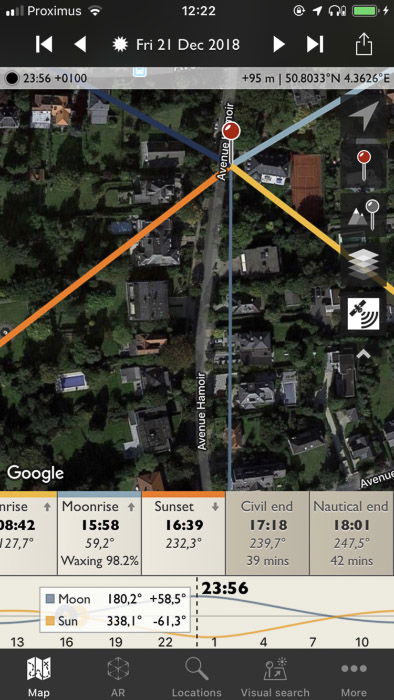
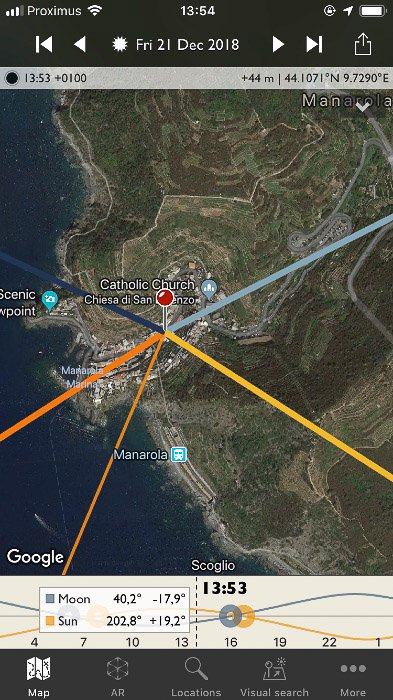
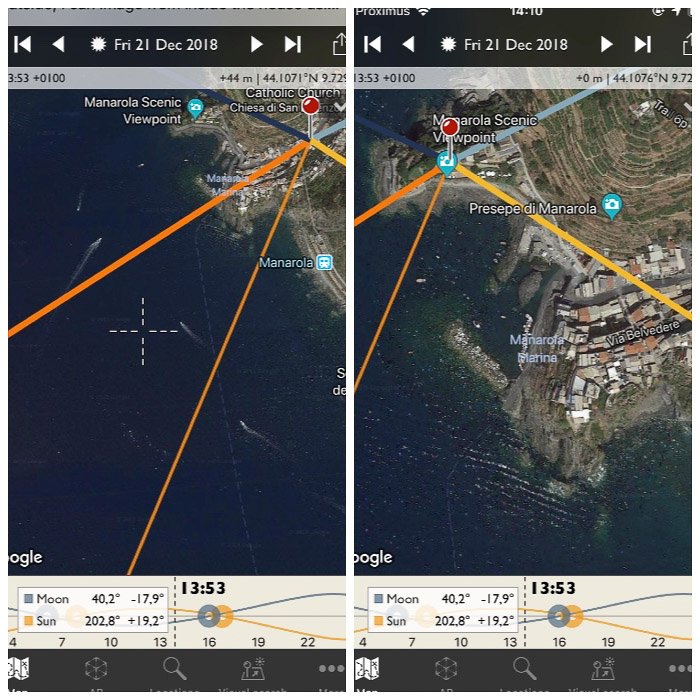
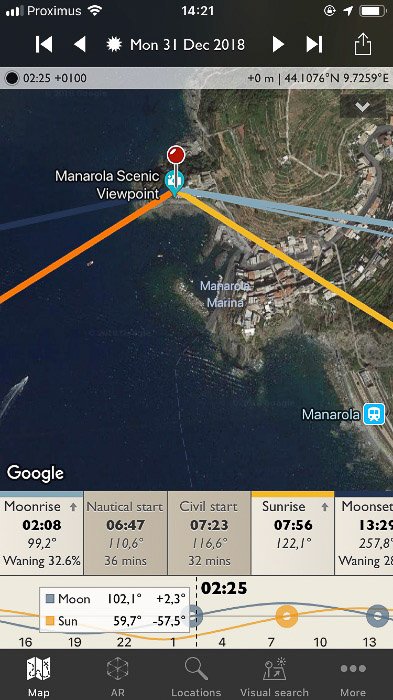
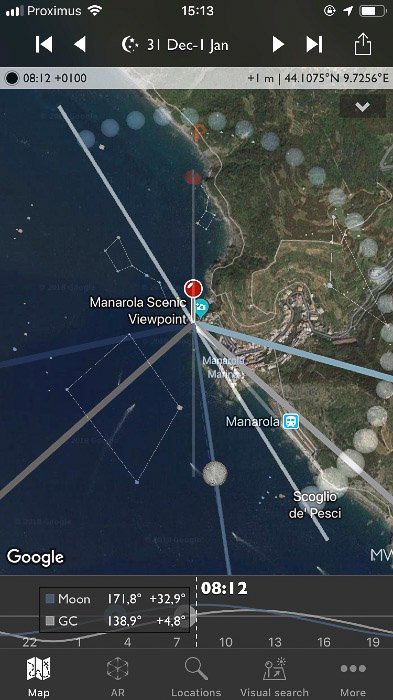
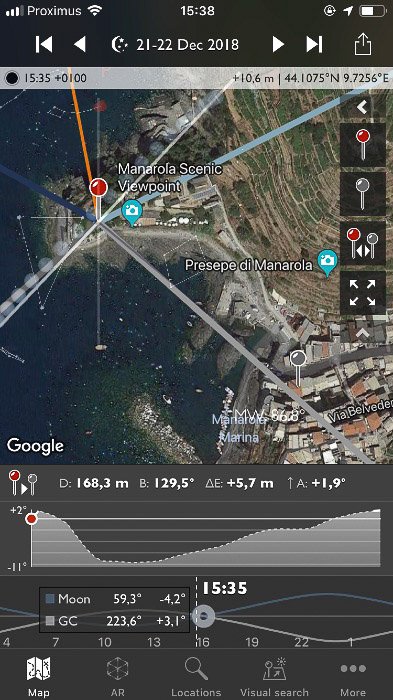
As soon as you fire up the Photographer’s Ephemeris, the map will be centered on your current location. To change it, you can tap the magnifier lens in the bottom tool bar. A menu will pop up and you can search for the wanted location. By tapping the first location among those proposed, you will have the possibility to save the location or to drop the pin on the Map. By dropping the pin you will be back seeing the map. With Manarola, the pin is dropped on the town center. But the best photographic location is the Manarola Scenic Viewpoint. Luckily it is easy to interact with the map and fine tune your pinned location. To zoom in/out you pinch the map and you can move it around as well, but the position of the pinned location will not change. When you move the map, a white cross will appear at the center of the screen. Move your map so that the cross will be on the new location, and tap once on the screen. The pin will be dropped on the selected location.
Set the Date
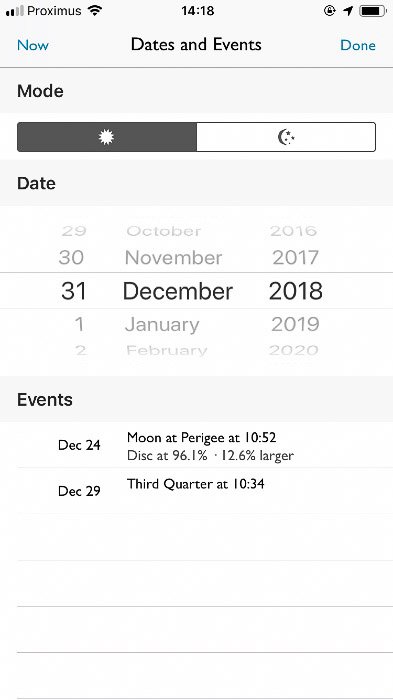
You can set the date for when you will be at the location in the top bar: here the full date is shown and on either side of it you have controls to move forward of backward 1 day at a time or to jump to the next relevant moment, such as the next full Moon. By tapping on the Date, you will bring up the Date/Event menu where manually set the preferred date and switch between Day and Night modes. A list of interesting events is also displayed. For our purposes, let’s set December 31st 2018.
The Sun and Moon: Set/Rise Time and Visibility
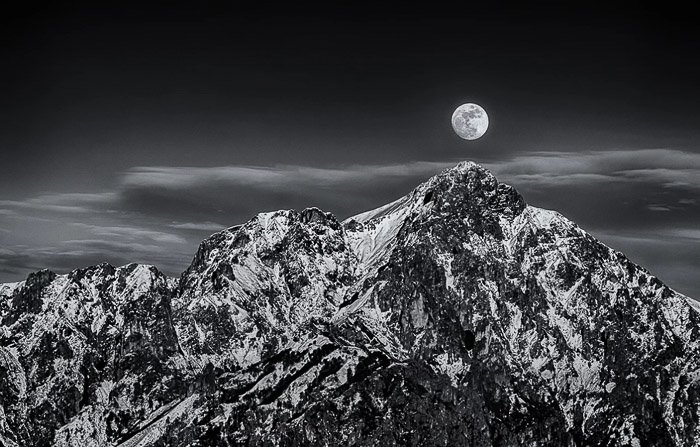
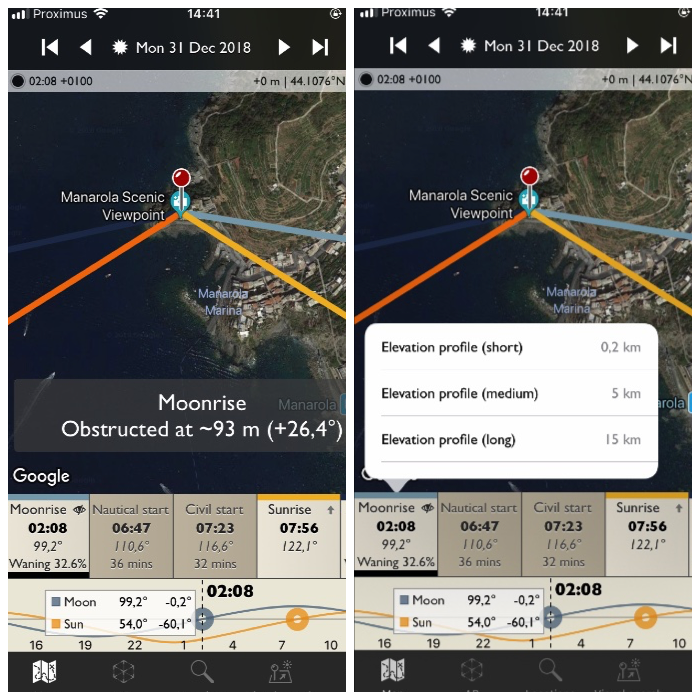
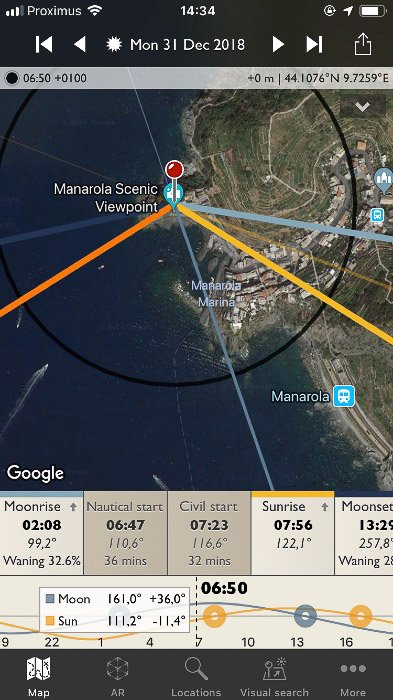
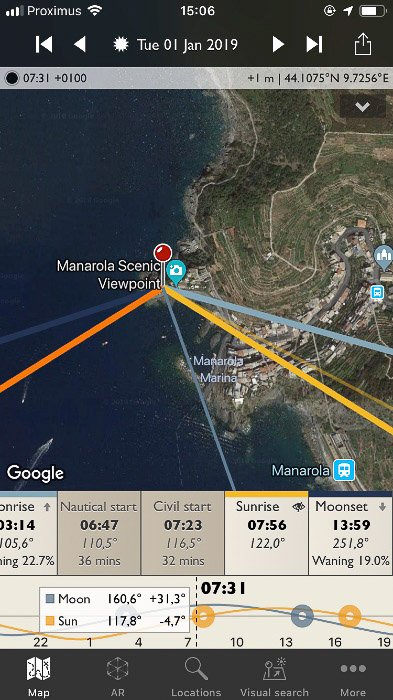
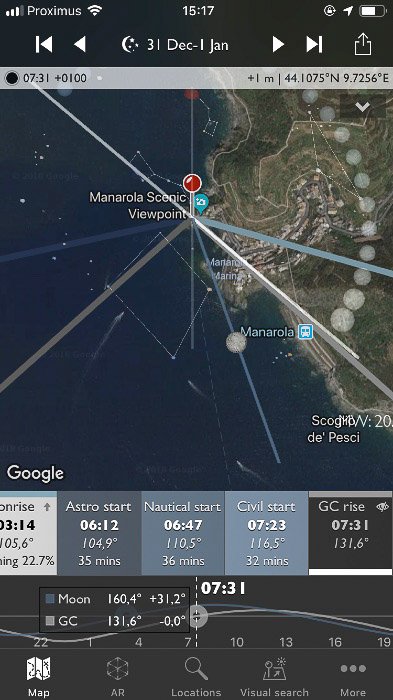
Tap once on the bar located below the map. The info bar will inform you that the moon will rise at 02:08 a.m. and the sun at 07:56 a.m. and so on. This info is available from any forecast website, but the Photographer’s Ephemeris does offer some interesting complementary info. The same info bar will tell you that the Moon will rise from 99.2º (from the North and moving clockwise N->E->S->W->N) and the Moon phase will be Waning with 32.6% illumination. The Sun will rise 122.1º from the North. Tap on those events and you will jump to the right time of the day and a message will be shown to inform you if the event will be visible or not. Mountains in Liguria go right up to the coastline. The horizon is obstructed in the direction of the main land. When you tap on the Moonrise event, The Photographer’s Ephemeris will inform you that the Moonrise will not be visible from the selected location. Tap again and you will have some more information about the elevation profile in the direction of Moonrise. If you look at the map, you see some lines originating from the pin, and those lines have different colors. The light blue points to where the Moon will rise, while the dark blue points to were the Moon will set. The yellow line points in the direction of the Sunrise, while the orange one indicates where the Sun will set. This already gives you an idea of where the Sun and the Moon will be with respect to Manarola. When you set the hour with the hour timeline, you can have up to two new, tinnier lines. One yellow, for the Sun, and one blue, for the Moon. Those lines indicate the position of the Sun and the Moon throughout the day.
Blue Hour, Golden Hour and Shadows
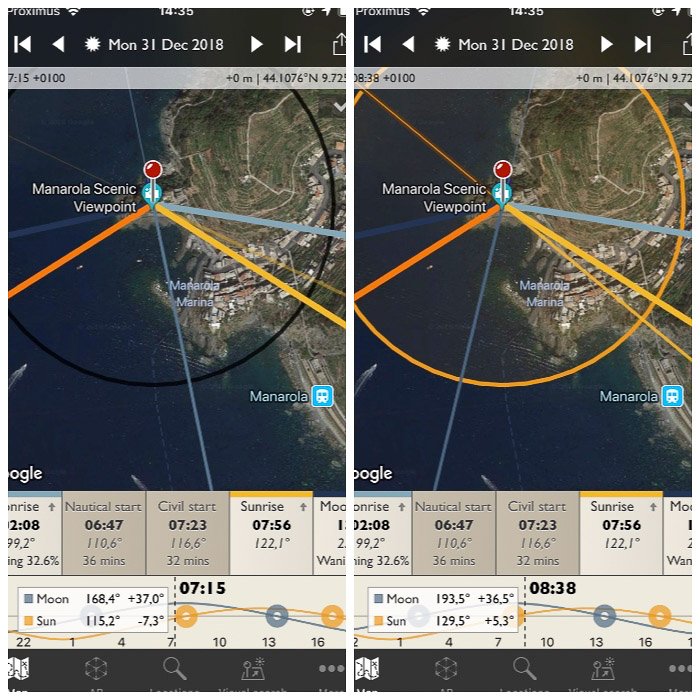
The line for the Moon will only be visible in-between Moonrise and Moonset. The one for the Sun will remain visible from the beginning until the end of nautical twilight. This information should be used to photograph during the so called blue hours, i.e.from the beginning of nautical twilight to sunrise and from sunset to the end of nautical twilight. The golden hour period is when the sun height above the horizon is 6º or less. While moving your finger on the hour timeline, observe the circle around the pin. When it changes from black to yellow, you are in the golden hour. The Photographer’s Ephemeris will also give you the direction and length of the shadows cast during the different moments in the day. That way you can have an idea if/when your target will be in the shadow, for example.
Putting All the Info Together
For our trip to Manarola, thanks to TPE we can say that from the scenic viewpoint, the Moon and Sun rises are obstructed. The Moon will be visible behind and on the right of Manarola at about 7:30 in the morning, during the blue hour. The sunset will be over the sea at about 90 degrees from Manarola. Once at the location, we can refine our plan by using the augmented reality feature. That will display information over the field of view of our camera phone.
Night Mode
If you are into astrophotography, while there are better apps that are more specific for the job, The Photographer’s Ephemeris provides an interesting night mode. This allows you to check the position of the Milky Way (indicated as an arch of circles, the bigger ones toward the galactic cores), the Moon, Polaris and that of few constellations. The info bar will now display info about the start and end of the civil, nautical and astronomical twilights, as well as Moon and Galactic center set and rise times.
How to Use the Photographers Ephemeris to Schedule Your Trip to Photograph a Particular Event
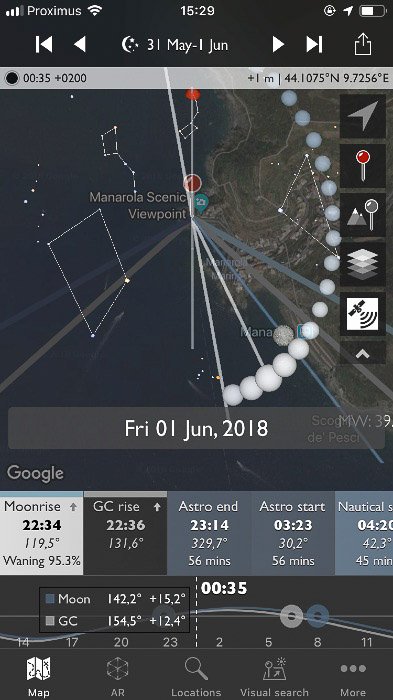
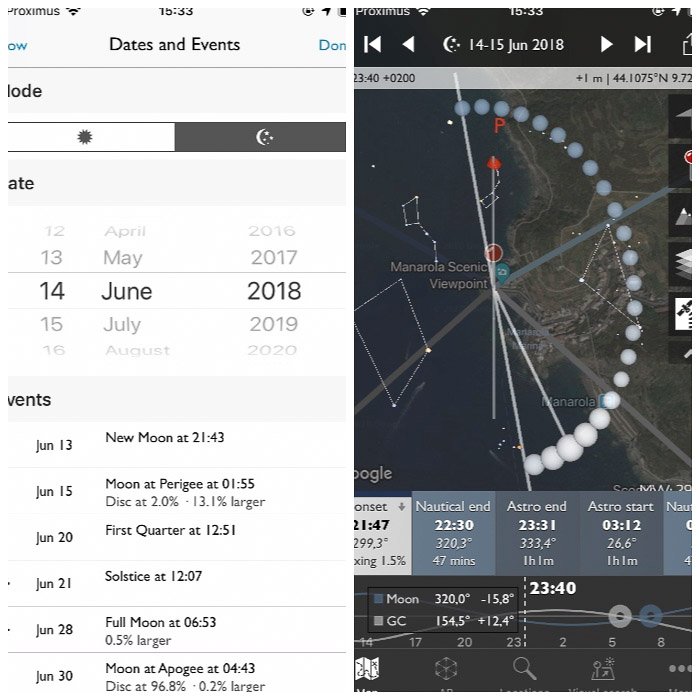
New Year’s Eve is not the best time to photograph Manarola with the Milky Way. That’s because the Galactic core will rise in daylight. With The Photographer’s Ephemeris we can look forward in time and find the best promising date to schedule our trip for a nighttime landscape session of Manarola and the Milky Way. We know the Galactic center is visible from April until late September. We can check the night between Friday and Saturday May 31st, June 1st. Unfortunately, while the Galactic center is in the proper position, the full Moon is next to it. Great if we want the Moon behind the town, but not the best date for the Milky Way. Looking at the Events in the Date and Events menu, we can see that the new Moon is on June 13th. This means that the night between Friday and Saturday, June 14-15th, would be ideal.
Advanced Use
Up to now we have seen a fairly basic use of the Photographer’s Ephemeris. A more advanced use involves dropping a pin for the target. This is the grey pin in the little menu available on the map. The Photographer’s Ephemeris will display information such as distance and altitude profile between your location and the target. You can also swap the location and the target pins. Other advance controls are the height of a target (to see if the particular target will obstruct the Moon or the Sun), ability to calculate its shadow length, set the height for the horizon and much more. There is also an integration with Skyfire, a professional forecasting service you can subscribe to.
Alternative Apps
As I said in the beginning, there are many apps that help you plan your photography sessions or trips. One interesting alternative, which also comes with astronomical calculators (such as the 500 rule and star trails) is PhotoPills. This is also available for both iOS and Android devices. We have already reviewed PhotoPills in this article.
Conclusion
The Photographer’s Ephemeris is great for planning your landscape or even urban photography session. With it, you can take advantage of the best light and astronomical events, such as Moon and Milky Way alignment with your target of choice. Whether you’re an urban photographer or an outdoor photographer, this app will come in handy.