The Auto Lighting Optimizer helps to adjust the photograph’s darkest and lightest areas. For photographers working with JPEGs, the tool can help bring out more detail in a photograph. But, at other times, the tool can create a negative effect. Learn what the auto lighting optimizer does, when to use it, and how to use it in this quick guide for Canon users. [ExpertPhotography is supported by readers. Product links on ExpertPhotography are referral links. If you use one of these and buy something, we make a little bit of money. Need more info? See how it all works here.]
What Is the Canon Auto Lighting Optimizer?
Canon’s Auto Lighting Optimizer is a camera setting. It adjusts a JPEG photo to bring out more detail in tricky lighting. ALO is in-camera processing that the camera does automatically. Once you turn it on, you don’t have to make the adjustments. The difference is often subtle, but most visible in the darkest areas of the image. The setting is on most Canon cameras launched after 2008, including Canon DSLRs. Other brands have similar tools that go by a different name. Nikon’s, for example, is called Adaptive D-Lighting. ALO makes selective adjustments to the photograph’s curves. Curves are a map of the image’s tones. Adjusting the curves tweaks the images darkest areas while leaving other tones intact. Designed for use with backlit subjects or when using flash, ALO lightens the shadows. That helps prevent details in the darkest areas of the photograph from being lost. The result, for images in tricky lighting, is a photograph with a bit more detail than if the ALO settings were off. ALO is also available in Canon’s Digital Photo Professional photo editing software, where it can be applied to RAW photos. But, the ALO isn’t designed for every photograph and should be disabled for some types of photographs.
When to Use the Auto Lighting Optimizer
ALO selectively edits the tone curve, so the setting is ideal for backlit subjects. When the light is coming from behind the subject, you will likely end up with a subject that’s in shadows. ALO lightens up those shadows to prevent a silhouette and keep those details intact. For the same reason, the setting is also good to use with flash. But, because the ALO lightens shadows, it reduces a photograph’s overall contrast. In a photo that’s lit from the front, or that has soft light, ALO may actually reduce the image quality. In a photo that doesn’t need lighter shadows because the lighting was already great, ALO will give photos a little less pop. Another downfall of allowing the camera to adjust those curves is that the image could end up with noise. ALO should be turned on for backlit subjects and when working with flash. But, with good lighting, the setting should be turned off to avoid reducing the image’s contrast or adding noise. Photographers that shoot in RAW should also leave the setting off. ALO does not have an effect on RAW images but could skew the image preview. With RAW, you can manually recover details in post-processing and get better results than with ALO. You can also use Canon’s photo editing software, but manual recovery gives better results.
How to Use Auto Lighting Optimizer
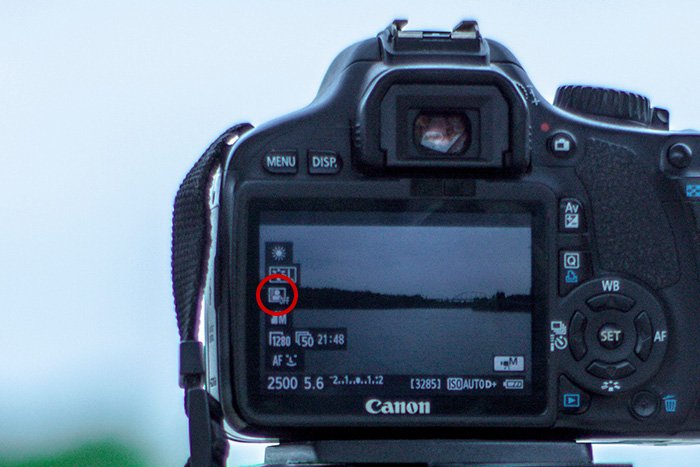
Using the Canon Auto Lighting Optimizer is a matter of turning the tool on and off inside the camera menu. While the process is similar across most Canon cameras, every camera model may have some variation. If you cannot find the ALO option, consult your camera’s user manual. First, look for the option in the quick menu for the fastest access. Press the Q to bring up the quick menu, then look for the icon that looks like a person inside of a square that’s half colored. The ALO is also found in the full camera menu. Press the menu button, then navigate to the shooting settings sub-menu and look for the Auto Lighting Optimizer option. It may be on page two of the menu. Whether you access the ALO from the quick menu or the full menu, the choices are the same. Disabled or off leaves the image unaffected by ALO. Low has the smallest effect and high the most effect on the image. Standard is between the two. Choose a setting based on the image. You may want high for a severely backlit photo. Standard will work for most images and low if you are worried about losing too much contrast. Remember to disable the ALO when you are no longer taking photos in tricky lighting. The difference in ALO is often subtle and can be a personal preference. Feel free to experiment and see which setting you prefer.
Common Questions
What Is Highlight Tone Priority?
Highlight Tone Priority does the opposite to ALO. Highlight Tone Priority keeps details in the highlights and brightest areas intact. It works by manipulating the image curve to underexpose the highlights. This setting limits the ISO range, and you cannot have both HTP and ALO on at the same time. Like ALO, HTP can increase the noise in an image.
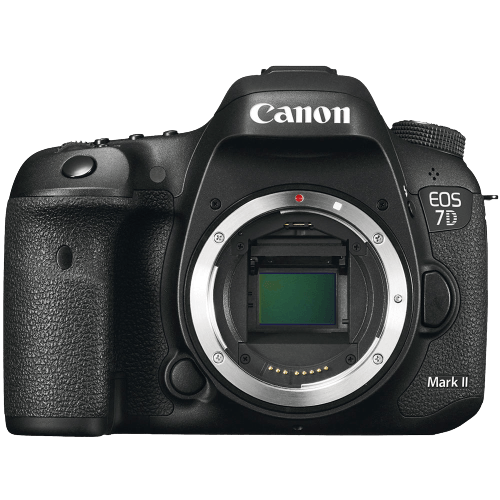
How Do I turn on the Auto Lighting Optimizer on Canon 7D?
On the Canon 7D, go into the menu, then navigate to the second page of the shooting sub-menu. Choose the Auto Lighting Optimizer, press set, then choose from disable, low, standard, or strong.
Conclusion
Canon’s Auto Lighting Optimizer helps keep the detail in shadows intact. The setting is ideal for JPEGs and tricky lighting scenarios but is best left off when the lighting is good. The Highlight Tone Priority does the opposite and preserves the highlights. RAW photographers should leave these settings disabled.
title: “How To Use Canon Auto Lighting Optimizer For Best Results” ShowToc: true date: “2023-01-19” author: “Amanda Krepps”
The Auto Lighting Optimizer helps to adjust the photograph’s darkest and lightest areas. For photographers working with JPEGs, the tool can help bring out more detail in a photograph. But, at other times, the tool can create a negative effect. Learn what the auto lighting optimizer does, when to use it, and how to use it in this quick guide for Canon users. [ExpertPhotography is supported by readers. Product links on ExpertPhotography are referral links. If you use one of these and buy something, we make a little bit of money. Need more info? See how it all works here.]
What Is the Canon Auto Lighting Optimizer?
Canon’s Auto Lighting Optimizer is a camera setting. It adjusts a JPEG photo to bring out more detail in tricky lighting. ALO is in-camera processing that the camera does automatically. Once you turn it on, you don’t have to make the adjustments. The difference is often subtle, but most visible in the darkest areas of the image. The setting is on most Canon cameras launched after 2008, including Canon DSLRs. Other brands have similar tools that go by a different name. Nikon’s, for example, is called Adaptive D-Lighting. ALO makes selective adjustments to the photograph’s curves. Curves are a map of the image’s tones. Adjusting the curves tweaks the images darkest areas while leaving other tones intact. Designed for use with backlit subjects or when using flash, ALO lightens the shadows. That helps prevent details in the darkest areas of the photograph from being lost. The result, for images in tricky lighting, is a photograph with a bit more detail than if the ALO settings were off. ALO is also available in Canon’s Digital Photo Professional photo editing software, where it can be applied to RAW photos. But, the ALO isn’t designed for every photograph and should be disabled for some types of photographs.
When to Use the Auto Lighting Optimizer
ALO selectively edits the tone curve, so the setting is ideal for backlit subjects. When the light is coming from behind the subject, you will likely end up with a subject that’s in shadows. ALO lightens up those shadows to prevent a silhouette and keep those details intact. For the same reason, the setting is also good to use with flash. But, because the ALO lightens shadows, it reduces a photograph’s overall contrast. In a photo that’s lit from the front, or that has soft light, ALO may actually reduce the image quality. In a photo that doesn’t need lighter shadows because the lighting was already great, ALO will give photos a little less pop. Another downfall of allowing the camera to adjust those curves is that the image could end up with noise. ALO should be turned on for backlit subjects and when working with flash. But, with good lighting, the setting should be turned off to avoid reducing the image’s contrast or adding noise. Photographers that shoot in RAW should also leave the setting off. ALO does not have an effect on RAW images but could skew the image preview. With RAW, you can manually recover details in post-processing and get better results than with ALO. You can also use Canon’s photo editing software, but manual recovery gives better results.
How to Use Auto Lighting Optimizer
Using the Canon Auto Lighting Optimizer is a matter of turning the tool on and off inside the camera menu. While the process is similar across most Canon cameras, every camera model may have some variation. If you cannot find the ALO option, consult your camera’s user manual. First, look for the option in the quick menu for the fastest access. Press the Q to bring up the quick menu, then look for the icon that looks like a person inside of a square that’s half colored. The ALO is also found in the full camera menu. Press the menu button, then navigate to the shooting settings sub-menu and look for the Auto Lighting Optimizer option. It may be on page two of the menu. Whether you access the ALO from the quick menu or the full menu, the choices are the same. Disabled or off leaves the image unaffected by ALO. Low has the smallest effect and high the most effect on the image. Standard is between the two. Choose a setting based on the image. You may want high for a severely backlit photo. Standard will work for most images and low if you are worried about losing too much contrast. Remember to disable the ALO when you are no longer taking photos in tricky lighting. The difference in ALO is often subtle and can be a personal preference. Feel free to experiment and see which setting you prefer.
Common Questions
What Is Highlight Tone Priority?
Highlight Tone Priority does the opposite to ALO. Highlight Tone Priority keeps details in the highlights and brightest areas intact. It works by manipulating the image curve to underexpose the highlights. This setting limits the ISO range, and you cannot have both HTP and ALO on at the same time. Like ALO, HTP can increase the noise in an image.
How Do I turn on the Auto Lighting Optimizer on Canon 7D?
On the Canon 7D, go into the menu, then navigate to the second page of the shooting sub-menu. Choose the Auto Lighting Optimizer, press set, then choose from disable, low, standard, or strong.
Conclusion
Canon’s Auto Lighting Optimizer helps keep the detail in shadows intact. The setting is ideal for JPEGs and tricky lighting scenarios but is best left off when the lighting is good. The Highlight Tone Priority does the opposite and preserves the highlights. RAW photographers should leave these settings disabled.
