But with the right steps, it’s definitely doable. In this tutorial, we’ll show you how to merge two photos in Photoshop using layer masks and blend modes. We’ll also give you a few tips for getting the best results. So let’s get started!
How to Merge Two Photos in Photoshop: Why Take More Photos Than You Think You’ll Need
I don’t mean you need to set your camera to fire continuously at high speed all the time. Photographing wild amounts in rapid bursts is rarely going to produce stellar results. Think carefully about what you’re photographing. Once you have your lighting and composition how you want it, take multiple images. This is especially important when there is movement in your composition. Capturing more photos than you think you will need can help in two ways. You are more likely to get a pleasing image. If you still don’t get a single frame you are happy with, you have more options to combine and merge photos in Photoshop.
How to Merge Photos in Photoshop
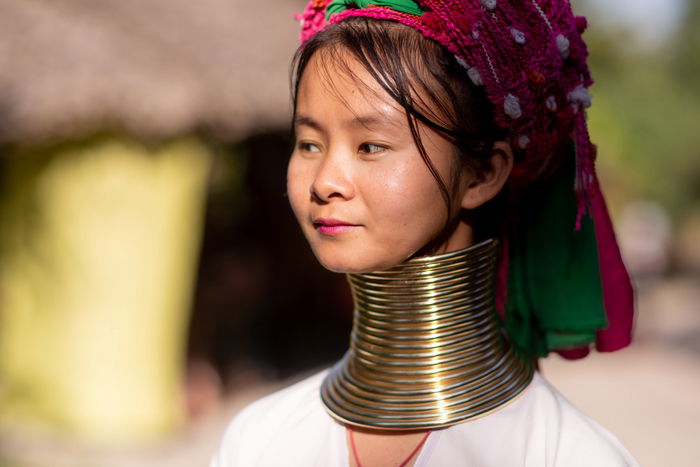
The photos I am using as examples in this article were made within a few minutes of each other. In one photo, more of my subject is visible, but she blinked. In the second photo, her eyes are open, but I was standing closer to her. Both were made with an 85mm prime lens set at f/2.
Step 1. Choose Two Photos to Merge
Whatever your reason for merging two photos in Photoshop, some photos will merge more easily than others.
Choose photos taken with the same focal length lens. For example, don’t try combining one photo taken with a 24mm lens and another made with a 50mm lens. The difference in lens perspective will not allow you to merge the photos seamlessly. Make sure the lighting in both photos is the same, or very similar. This may not always seem necessary. But different lighting can cause results to look unnatural. Use two photos of the same resolution. Pick photographs that are not too complicated. If you are choosing two photos taken at a different time and location, you will need to ensure the white balance in each is as close as possible to the other.
Step 2. Open a Photo
Open the first of your two photos. If your main subject is a different size in each photo, open the image where your subject is the smallest. This way you can resize your second photo down, rather than upscaling it. Sizing down will not result in noticeable quality loss, whereas scaling up may. Click the padlock icon on the right side of the layer in the Layers Menu to unlock the background layer.
Step 3. Open Your Second Photo
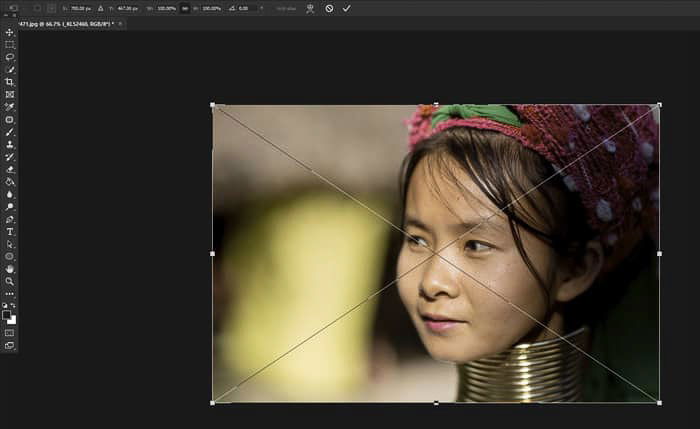
Then from your computer’s filing system, click and drag the second photo on top of the first and align them. There will be an overlaid X on the image and a box with transform handles around the edges. This is important if you need to resize your photo, as I do in this example. Bringing the second image into Photoshop in this manner includes it as a Smart Object. You can resize this better. You will not want to enlarge either of the photos you are merging by more than about 30 percent. If you do, the clarity of the enlargement can be noticeably different.
Step 4. Position Your Photos to Match
Set the top image layer blend mode to Overlay so you can see the layer underneath as well. This will allow you to position the subject in the two images to match correctly. Click Edit > Free Transform from the top menu ( Ctrl + T). With the Move tool selected, position the top image so the parts of the top layer which you want to retain look good. You may need to use the resize handles to enlarge, shrink or rotate this layer so the two layers match properly. In my example, I am mostly concerned with the way her eyes will look. I have scaled down my top layer and rotated it slightly so her eyes on both layers are aligned. If your camera position or subject moves even a little, you may find it impossible to match the two subjects perfectly. Once you are satisfied you have the top layer positioned well, press Enter. Change the blend mode of your top layer back to Normal.
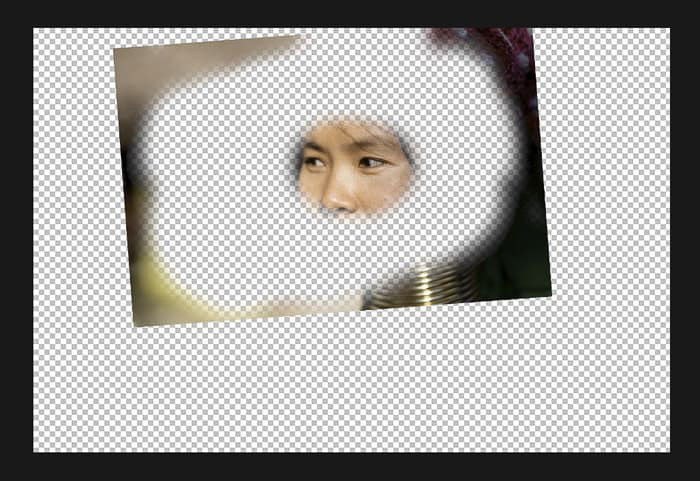
Step 5. Create a Mask and Erase
With your top layer selected, click the Add Vector Mask icon at the bottom of the Layers panel to add a layer mask. This creates a mask that you can use to erase the parts of the top image you do not want to see. Select the Brush tool and check that the color is set to black and at 100% opacity. Begin painting over the areas you want to eliminate. If you make a mistake, a quick way to restore the image is to switch the brush color to white and paint over the same area. Start at the parts of the image furthest away from the parts you want to keep and move in towards them. As you get closer, you may want to make the brush size of your eraser tool smaller and reduce the opacity. This will mean you are not erasing entirely with each brush stroke you make. Working like this helps create a smoother transition around the area you are erasing.
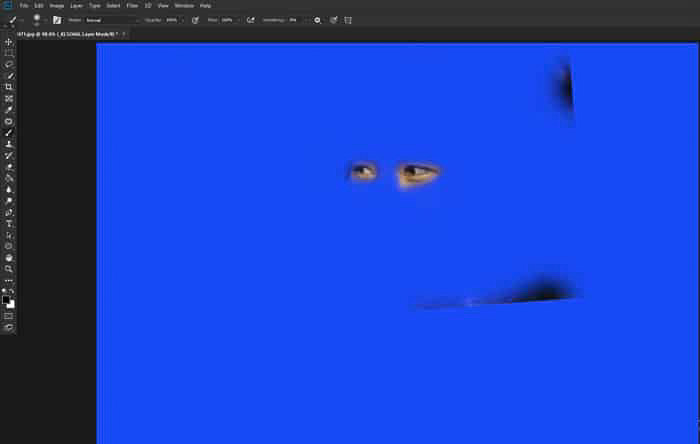
Step 6. Check Your Accuracy
Switching the layer visibility off and on again in the Layers panel will help you to see if there is more of the image you need to work on. Create a new layer or a separate layer between your two existing layers. Fill it with a strong color that does not appear in the photos you are working with. This will show any parts of your top layer which are not erased properly. To ensure both layers have the same tone value, you may need to lighten or darken the top layer using the Dodge and Burn tools. I used the Dodge tool slightly around her eyes so that her skin tone matches on both layers.
Step 7. Merge The Two Layers
If you created an intermediary color layer, delete it. Now merge the two layers by choosing Layer > Flatten Image from the top menu. Now you have a single merged image that looks better than either of the two of your source images.
Conclusion
You can apply this series of steps to merge photos in Photoshop. In the original image, I showed a very common reason to blend images together—someone blinked when a photo was taken. This is even more common when photographing more than one person at a time. Combining images in Photoshop is a common practice among architectural photographers. Being able to light a whole scene evenly and capture it in one frame can be challenging. That’s why knowing how to merge photos in Photoshop can be such a lifesaver! Check out our Effortless Editing with Lightroom course to master any edit you may need!