Food Typography 101: Ideas, Problems, and Solutions
There are some questions you need to ask in advance. Still life photography in general requires time spent in preparation to the shooting. This is especially true for food typography. And not just because arranging a hundred M&Ms into a coherent sentence requires a lot of patience. You also need to know exactly how many M&Ms you are going to need. And which background you are going to use. And exactly what you are going to write. So, plan your shooting in advance. Make a sketch. Decide which tools and materials you’re going to use. How do you want to compose the image? How large are your letters going to be? Basically, you need to answer three questions:
What sentence do you want to create? How are you going to form letters? What materials do you want to use?
Let’s take a closer look at them.
1. How Do You Decide What to Write
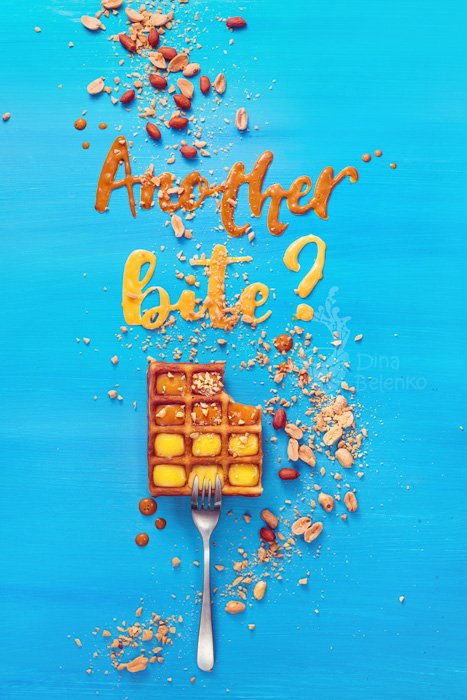
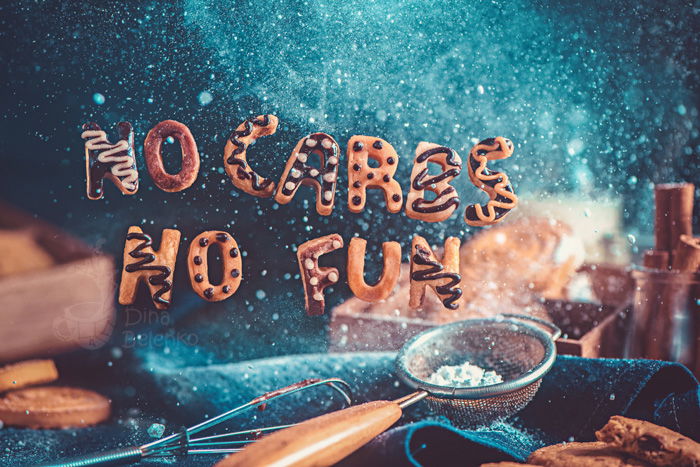
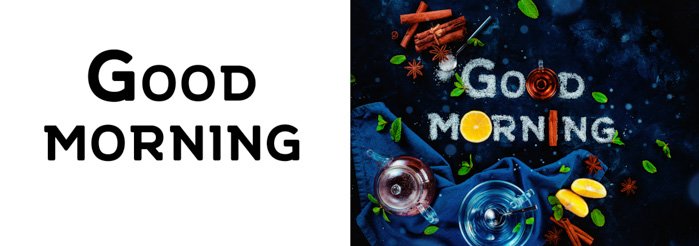
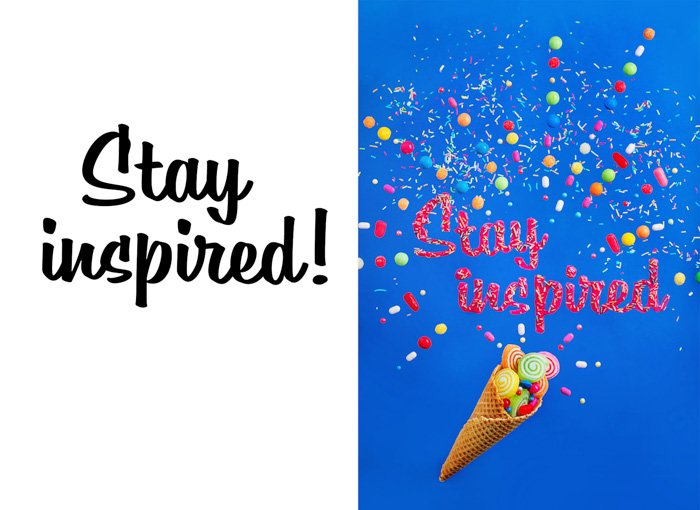
Coming up with words for your first food typography experiment is entirely up to you. But here are a couple of ideas to get your imagination moving. Of course, it’s better to start small and not to recreate the first paragraph of Leo Tolstoy’s War and Peace. Short words will allow you to crop tighter and look closer to food. The viewer can see the details and the delicious texture of your sweet or savoury drawing materials. Your first choice can be just the name of the food you’re using. Radish written with slices of radish or salad made from its ingredients. You may also go for a brief exclamation like sweet, cool, or yum. If you want a longer sentence, try to offer someone another cup of tea or one more waffle. Wish someone good morning or bon appétit. Tell your kids not to play with their food (while playing with food yourself, yes). Phrases like I’m going to the gym tomorrow written with all kinds of sweets also look lovely!
2. How Are You Going to Form the Letters
I browsed through lots of food art photos for this article. And I noticed that there’re four major ways notable typographers and food stylists use to form their letters. Sure, they all use very different tools and materials. Many of these artists have unique and distinct styles. But I tried to simplify the techniques suitable for food typography and dimensional type in general. I picked a few that a newcomer can use easily. Something suitable for a person who’s into creative food photography and still life, but isn’t familiar with calligraphy or lettering. In the end, you have about four major choices. Namely:
finding objects similar to letters; forming words from a group of small objects; utilising kitchen forms and molds; using powder-like substances and templates.
Let’s take a look at each of these ways one by one.
Food That Already Looks Like Letters
This is perfect for anyone looking for fun food ideas. Say, the letter O can be created by anything round. A donut, a yolk, the print of a tea cup’s bottom on a linen napkin, a cookie or a bowl of soup. My favourite way to approach it is to pick a theme and start searching within its boundaries. The theme can be any food you like: sweets, vegetables, comfort food, desserts, pasta, salads, garnishes, spices, you name it. Make a list of all the items for this theme you can use and assign a letter to each one of them. For example, you can pick summer drinks.
A quarter of a big grapefruit can represent D. A slice of orange combined with a cinnamon stick is for P. Spiral of a peeled lemon zest is for S. Use four mint leaves to create X. A glass of lemonade with a cherry on a rim is a good stand-in for Q.
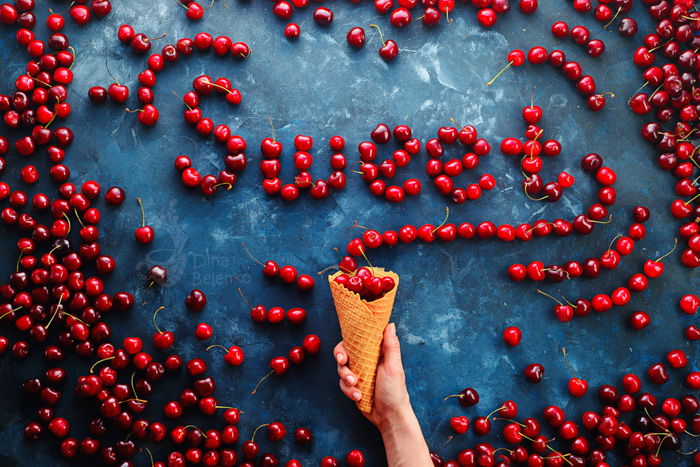
Use a Small Group of Objects to Form Words
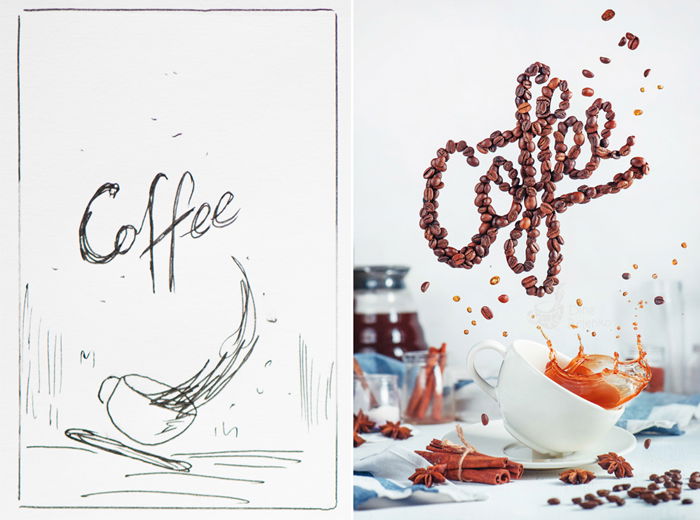
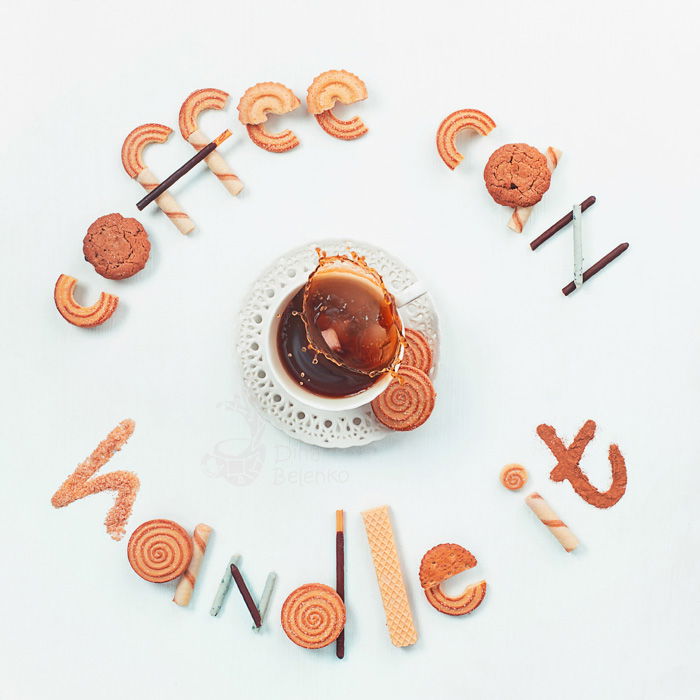
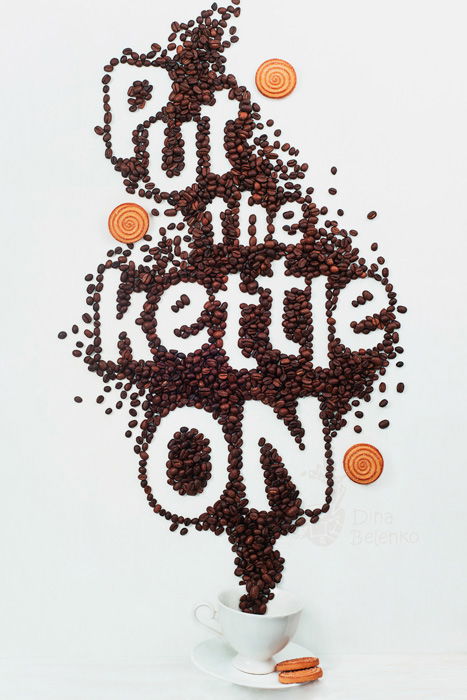
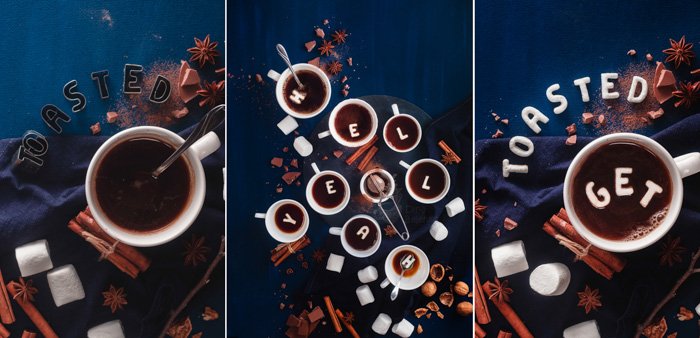
Take your time here and be patient. This is where you put small objects in the outline of letters to create a word. It’s a rather simple and meditative process. Mark the outlines of future letters with a pencil. Make a pair of tweezers your main tool and start to put candies, berries or chocolate drops one by one in a line. Be careful not to touch already formed letters and move through the entire word. Make sure you have plenty of objects to work with. There’s nothing as frustrating as going through half of the sentence and discovering you’re out of hard candies or coffee beans. search your pantry and find something you’d love to work with. This may be colorful grains (green mung beans and orange lentils look great), peas, berries of any kind, grapes, bonbons, marshmallow, tiny cookies, cherry tomatoes, basil leaves, ungrounded black pepper or kumquats. My first pick would be coffee.
Use Kitchen Forms, Molds and Cutters
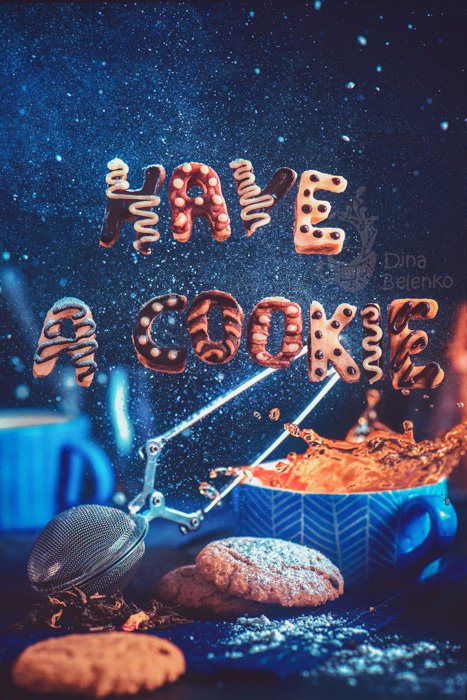
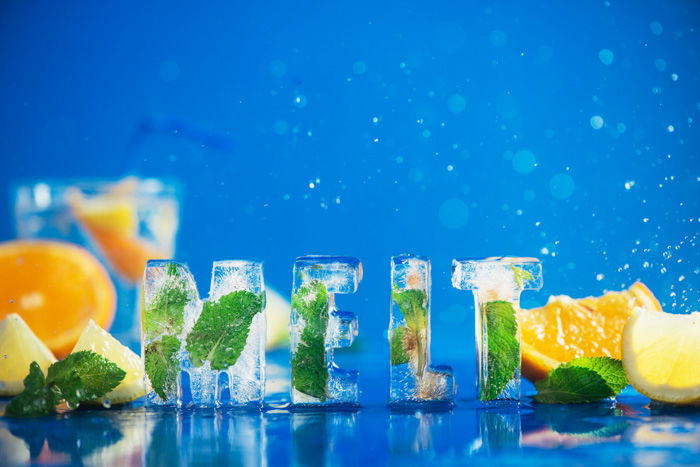
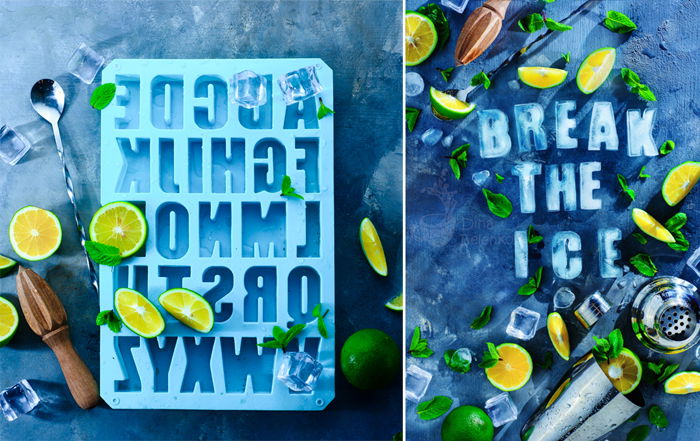
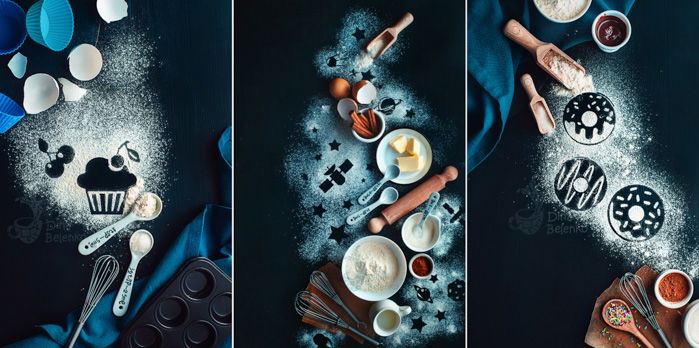
The possibilities here are endless! First of all, you can use cookie cutters and bake yourself an entire alphabet! Cookies are easy to work with since they can survive a little rough treatment. They’re not like delicate macaroons or fragile cheesecakes. You can play around with cookies endlessly until you create a perfect composition or even hang them in the air and take a shot with flying food! Besides baking cookies, you can use cookie cutters to make decorative pie crust. Simply cut the sentence on the top crust before you it put on a pie. Add your usual decorative finishes like ruffled edges and bake. Let the filling be visible through your letters. Or dust it with powdered sugar to make it even more beautiful. Another thing you can use is a variety of ice cube moulds and trays. Freeze some berries and mint leaves with your ice to create melting letters. The best thing about them is their volume. That means you can use your alphabet of ice cubes for more than a flat lay (most of food typography is flat lay shots). Put the word Summer into a glass of lemonade, add the word Sparkle to a champagne flute. Use ice letters to write in a bowl of punch or a still life with soda.
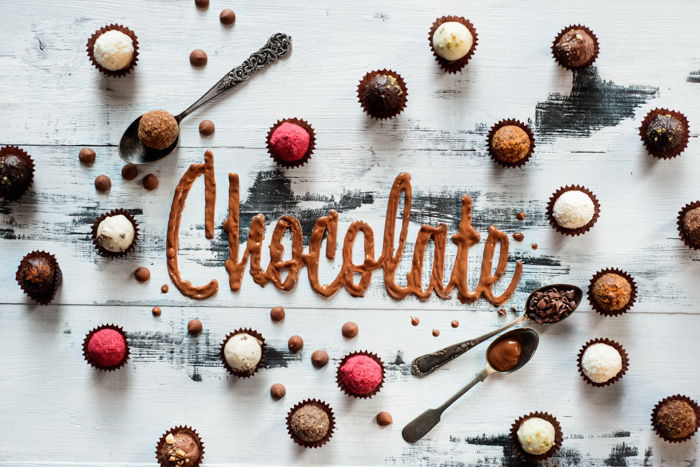
And last but not not least, silicon moulds. This is the Holy Grail of food typography! Fill them with chocolate, let it cool down and get your sweet chocolate letters! Melt some candies in them and get letters made from caramel. Or prepare some biscuit dough! Bake it in this mould and decorate your cake letters with the glaze or ganache of your choice. The most lovely thing about this is that you can eat the props later.
Use Powders and Letter Templates
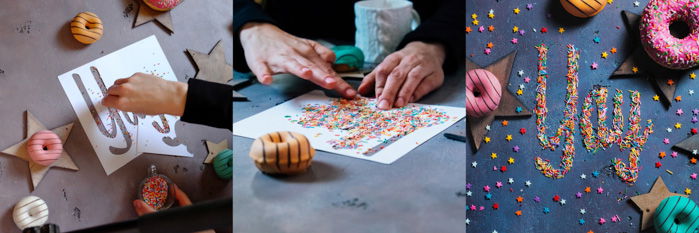
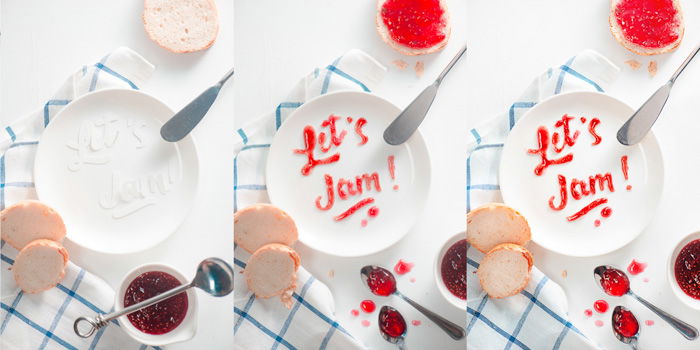
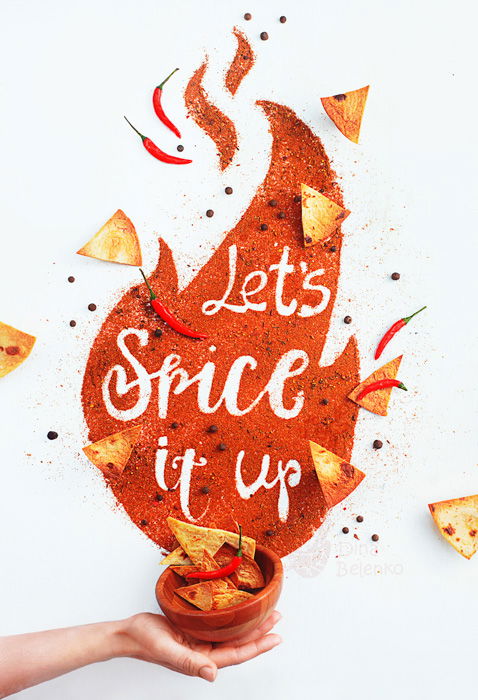
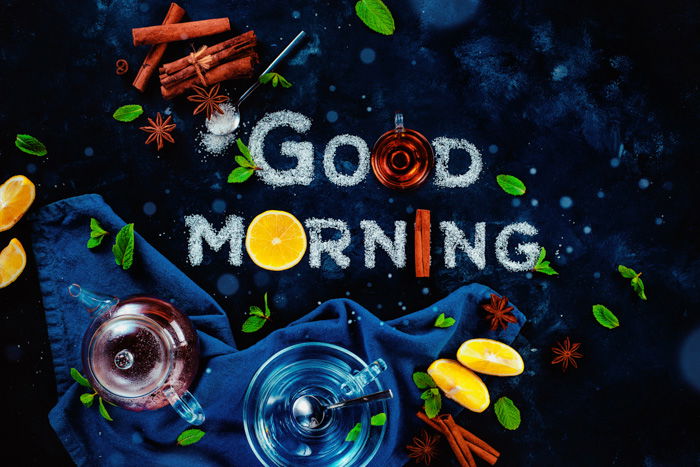
Another way to play with words is to work with a template. This is perfect for someone who doesn’t want to draw the letters and would rather work with an existing type. The trick works in the following way. Print the text you want to use and cut it from a sheet of paper with a layout knife. Fill out the template with something free-flowing like sugar, sprinkles or confetti. Carefully remove the template with tweezers and photograph the letters. Sounds pretty easy, right? It is! The main thing you need to keep in mind is using an appropriate font. Choose something with bold, easily recognisable letters. Especially if you want to scatter powdered sugar or sprinkles inside them. Give preference to italic fonts if you want to form letters with negative space. Fonts like these try to imitate handwriting. So the letters are often connected to each other. Templates with aligned letters are easier to arrange evenly. And they’re easier to lift with tweezers when the backdrop is covered with powder. If you form letters using negative space, the inner contour of letters should be empty. And the parts of the background not covered with powder should form the word. Templates also work if you want to make your words from a liquid like syrup or jam. Attach your template to a background with double-sided tape. This is important because moisture can make the template curl up otherwise. Fill it with sauce, syrup, jam or ketchup using a small syringe or a hard brush. The edges of the template will hold the liquid preventing it from spilling. Surface tension is a fantastic thing!
How to Pick Your Raw Materials
If moulds, templates, and cutters are like a traditional artist’s tools, then the grains, cocoa, and berries are a lot like watercolors and paint. So choose them with thought and care. The connection between the font and the ingredient is important because it will help you create your story. It makes sense to write about a healthy lifestyle with beans and peas. Or to create words about happiness and hedonism with cookies and chocolate. Say that you love someone with words on a pie crust. Use melting ice cubes to talk about something time-sensitive and fleeting. Utilize hot spices for something energetic and maybe a bit aggressive. And, sure, you can use glazing and sprinkles to warn people of the dangers of excessive sugar. Every detail adds something to an atmosphere. It makes your story richer and your image more interesting to look at.
Step By Step Tutorial
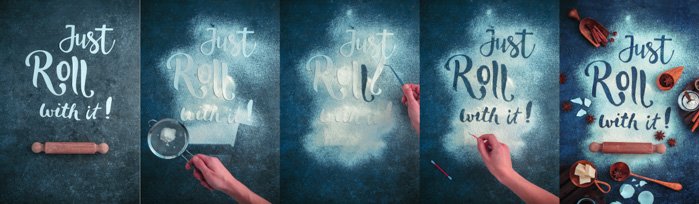
For this food art typography tutorial, we’re going to use a template. This is the simplest and most accessible way to get started in food art. It suits practically everyone. Even people with terrible handwriting (like me) can try this one and get a lovely shot!
1. Props and Gear
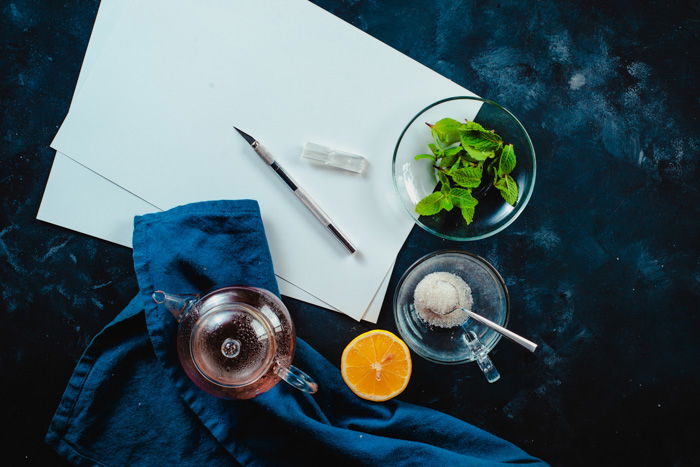
The main thing we need is a paper template with letters. You can type a phrase you like to use with any font without thin serifs. Something like Gabriola would look perfect. Bonus points for a message that makes sense in the context of your scene. Phrases about productivity would look nice with a cup of coffee, phrases about little joys of life — with a cupcake. Print your text and cut it out with layout knife and small scissors. Be patient, it may take some time, but our final picture is worth it. Larger letters are much easier to cut out but don’t forget to check if your backdrop is large enough to include the entire message. For example, my backdrop is about 60×90 cm. And I want to include in the frame not only my text but some still life items like spoons and teacups. That means my letters should be no bigger than 7-10 cm. Besides the template, we’ll need:
some sugar (or anything powdery like cocoa, cinnamon, paprika, turmeric, you name it) a strainer some cotton buds a pair of tweezers additional objects for your still life like lemon slices and napkins to create the atmosphere
Choose the tweezers you’re most comfortable to work with. Dental tweezers with curved ends are always the best choice, but regular ones will also do.
2. Arranging the Composition
Usually I prefer to work on the composition before filling the template. That way it’s convenient to move objects around without the fear of disturbing the text. Place your template in the center of the composition. After that arrange other objects starting from the most massive ones (napkin and cups) and moving to little details (mint and lemon slices). This composition is rather simple, so I arranged only my main objects, leaving the details for later. It’s good if you can arrange your composition in a way that some objects interact with the words. That, hopefully, will make your viewers think about the time and effort you put into this photo. And make them look at your work a little bit longer. I decided to add some objects at the top of my sugar letters. A small coffee cup covering the letter O should look nice.
3. Forming the Letters
Everything’s in place? Perfect! Take away everything except the letters. Dust the template with sugar using a strainer to form an even thin layer. Make sure that the outlines of every letter are separated from the backdrop. That way, the message is easy to read. You can also use a hard brush to sweep some sugar from the template inside the letters. This way you can lift the paper and not scatter excessive sugar on the background distorting your text. Remove all the paper template with tweezers and fix the shape of letters with cotton buds if needed.
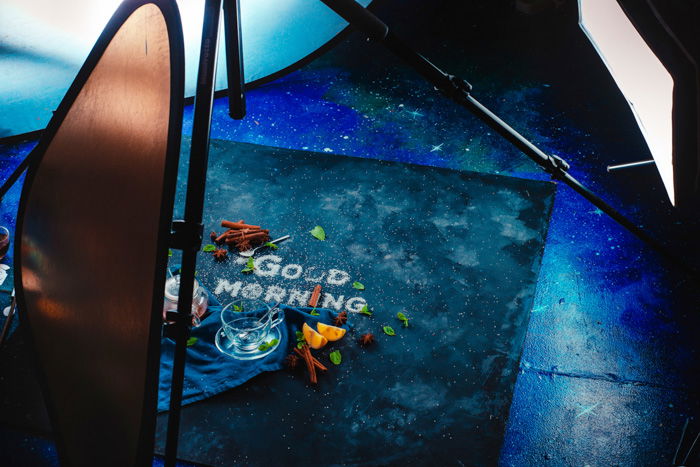
4. Lighting
Put all the props back in their place and set the lights. You can use pretty much any lighting scheme you like. In my case, there are two speedlights. But I don’t see any reason not to shoot with a natural light from the window if you want to. I wanted the sugar to have a very pronounced texture, so I used rather harsh key lighting. From the right, the scene is lit by a speedlight in a stripbox. I placed this speedlight very low, on the same level as my backdrop. It’s practically on the floor. To balance that light and lift the shadows I used another speedlight behind a large diffuser on the left. The last touch is a reflector at the bottom.
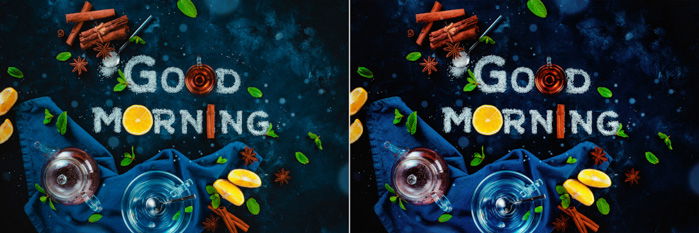
5. Shooting and Post-Processing Food Art
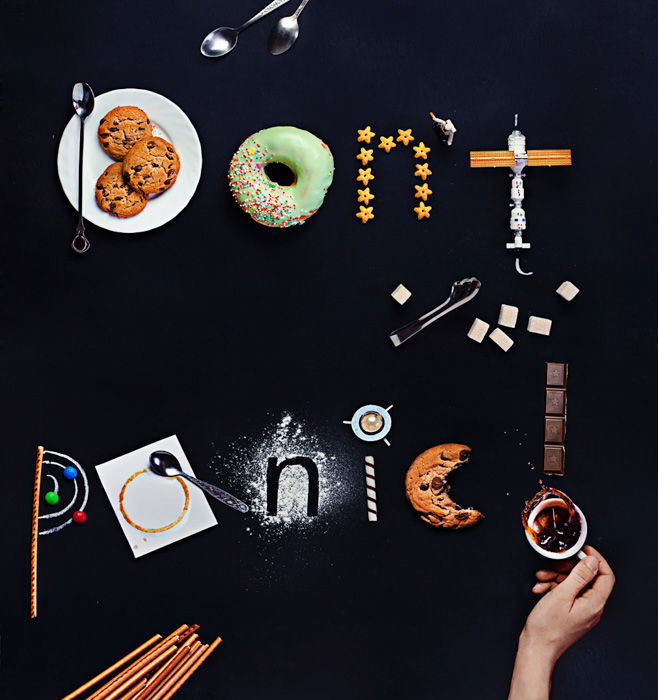
Make sure you like your light and composition. Take a picture! You may want to scatter some sugar from above. Or maybe drop a sugar cube into a coffee cup to add some action (check my other tutorial about high-speed photography). There’s almost none post-processing involved, just a quick adjustment of colors and contrast. In addition, you can delete any sugar particles that were too risky to remove with cotton buds. Voila! Your kitchen poster is ready! Food typography creates the great possibility to add something new and creative to a usual food photography session. Try this trick with the template, replace sugar with paprika or cocoa. Write something hot with mustard and something sweet with a chocolate sauce. Note that scattered flour on a black background looks like the starry sky. So why not experiment with adding some silhouettes of stars and spaceships? Try different materials and different ways of creating words. Find something that works for you to create original and special work! And the most important thing: don’t worry about the mess and have fun!