Using the Glitch Effect in Photoshop: What is It?
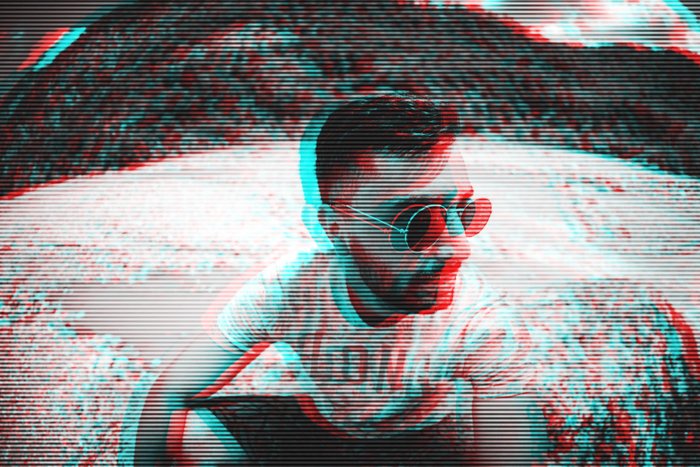
A glitch is a temporary analog or digital error. It usually appears in television or video games, but it can be found in every area of technology. A glitch is caused by a malfunctioning of a system. Originally, the glitch effect appeared on images with broken data. The appearance of this error consists of jagged lines, colorful pixels, distorted colors, and frozen visuals. You are probably familiar with the looks of the glitch effect, but you might not have imagined that it can be converted into art.
Reasons to Use the Glitch Effect
The glitch effect can be used as an artistic tool to create interesting looks. What makes the glitch effect appealing to our eyes is how it looks familiar, yet it is always different due to its chaotic nature. There is a kind of imperfection in glitches, which is unusual for us, therefore grabs our attention.
How to Create a Glitch Effect In Photoshop
Before creating the glitch effect in Photoshop, you will need to make a few adjustments to the original image to make it look more authentic.
How to Prepare for Creating the Glitch Effect
Step One: Find and Open a Suitable Photo
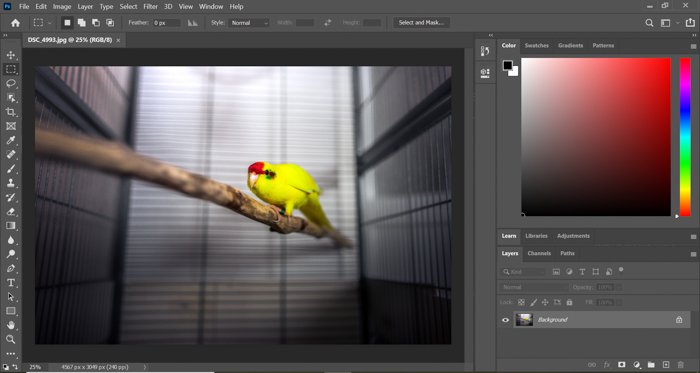
To create a glitch effect in Photoshop, it is best if the subject has clear edges. It is also useful if the background has distinct lines. Once those lines are distorted, it will make the effect stand out more. Open Photoshop and drag the photo into the programme.
Step Two: Make a Selection of Your Subject
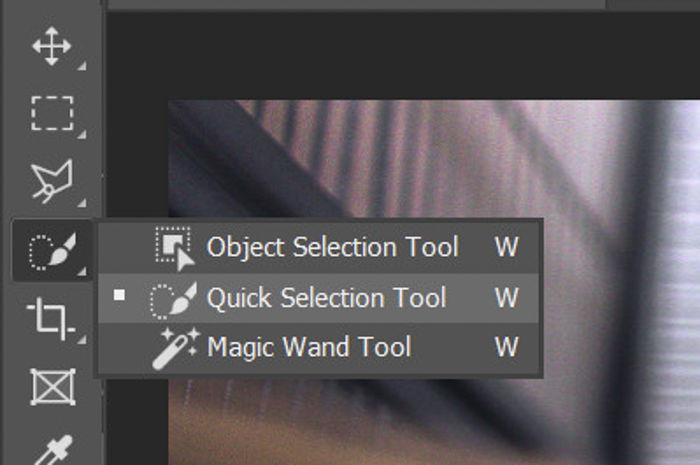
Choose the Quick Selection Tool in the left sidebar. In case you can’t find it, right-click the Object Selection Tool first.
With the Quick Selection, select your subject. This can be a human if you are working with a portrait. For me, it will be the yellow parrot. You can also refine the edges if you are looking for a smoother selection.
Step Three: Create a New Layer of Your Subject
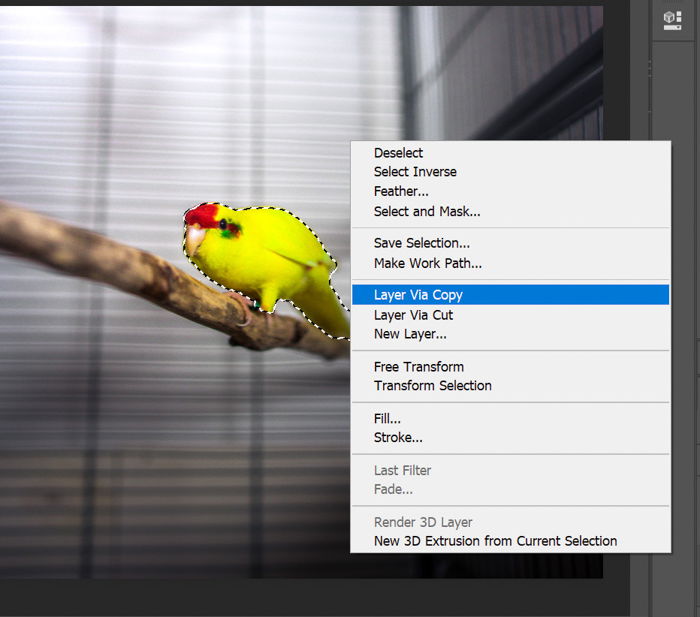
By right-clicking the selection, choose ‘Layer Via Copy’. This will be necessary because you will have to make a few adjustments to your subject alone.
Step Four: Use the Crop Tool to Expose Some White Background
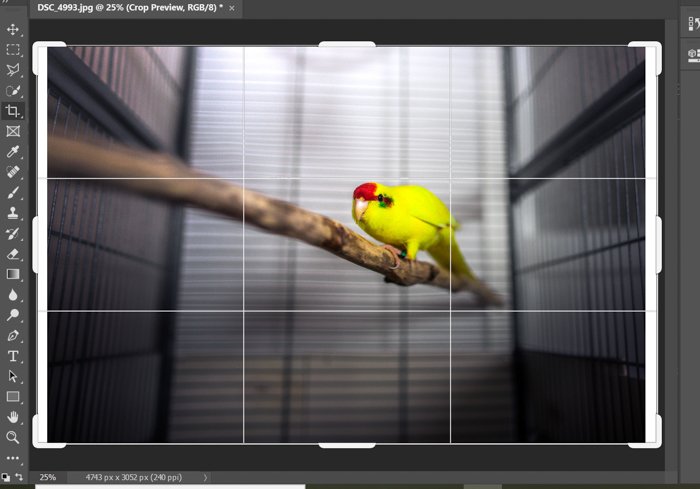
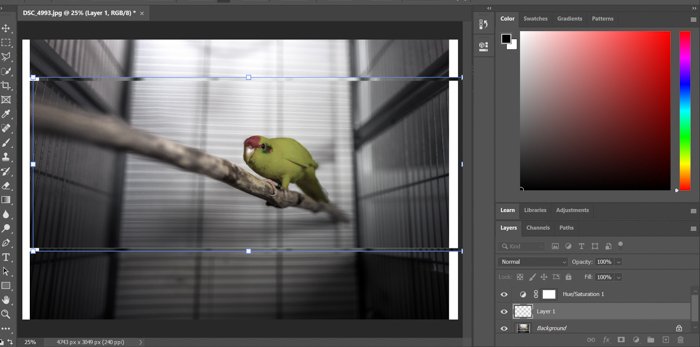
Select the Crop Tool on the left and pull both sides a little out so that you expose two stripes of the white background. Later this white will help you create the glitch in Photoshop.
Step Five: Edit Saturation and Contrast
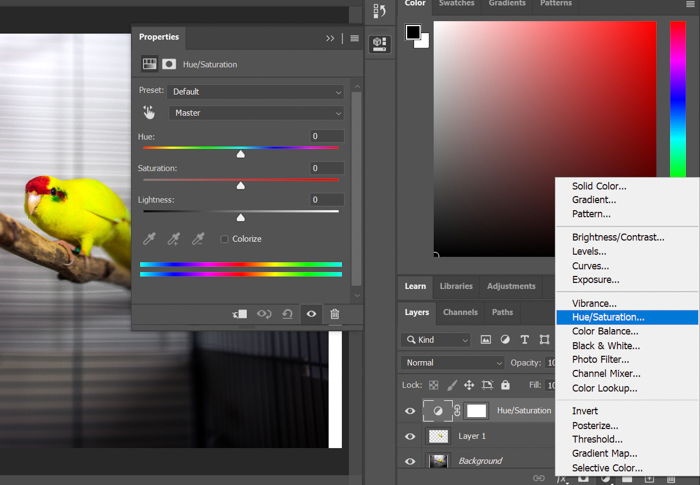
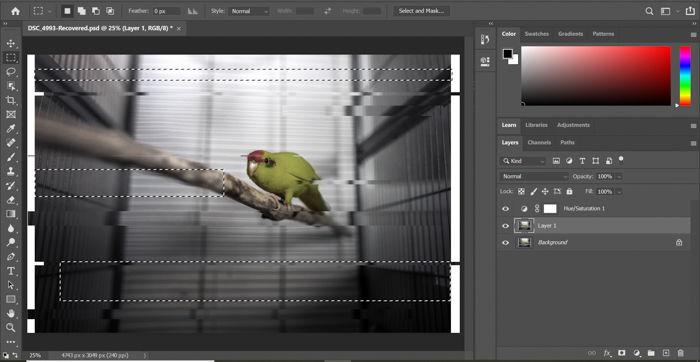
You need to adjust the saturation for a more monochromatic look. Go to the right corner, under the layers panel, and click ‘Create new fill or adjustment layer’. Choose Hue/Saturation. This will create a new adjustment layer that will appear above the other layers.
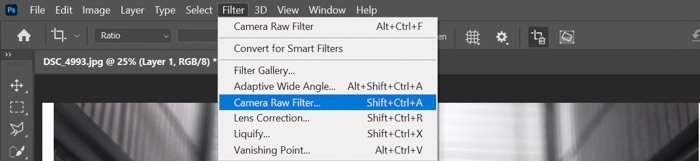
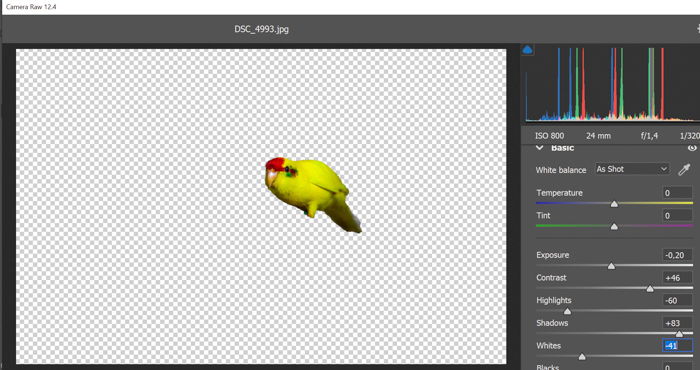
Grab the Saturation slider and drag it to the left until you have barely any colors on the photo. You also will have to give your subject some contrast to reach the desired effect. To do so, select the layer that only contains the selection of the subject. Go to Filter> Camera Raw Filter and use the sliders on the right to achieve more contrast. Once you are done, press the enter on your keyboard.
The reason we are doing saturation on a separate layer, unlike contrast, is that an adjustment layer lets you edit that specific adjustment any time later on. After you are finished with creating the glitch effect, you might think that you have to add or remove more saturation. You can easily do so by editing this saturation slider.
Step Six: Merge Layers
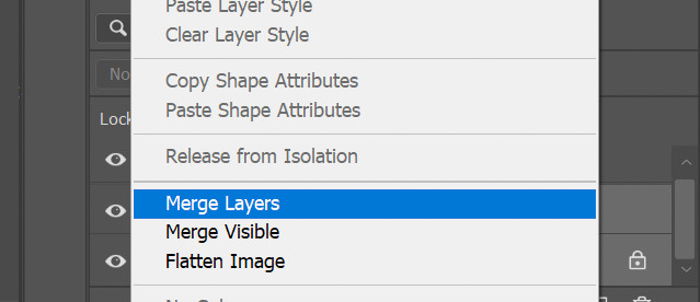
Now that you have edited the subject layer separately, you can merge it with the background. Select both layers by clicking on them while holding Ctrl on your keyboard. Right-click on the layers and select ‘Merge Layers’.
We are done with the preparation part; let’s get onto creating the glitch effect!
How to Create the Glitch Distortion
A glitch consists of many effects, from distorted lines to inverted colors. Therefore, to reach the glitch effect in Photoshop, you need to use several tools that I will explain below.
Step One: Use the Rectangular Marquee Tool
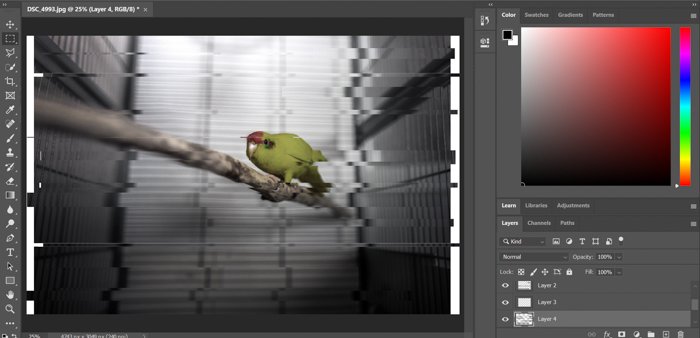
Select the Rectangular Marquee Tool on the left sidebar and use it to create two thin selections on the top and bottom of the photo. Make the first selection, then press Shift on your keyboard to be able to make the other one simultaneously. Right-click the selection and choose “Layer Via Cut”.
Press Ctrl+T to be able to free transform the selected area. Use the arrows on your keyboard to move the stripes left or right. You will see some of the white background being exposed.
Repeat this process a few times with selections of different size. After you are done, merge the newly created layers with the background.
Step Two: Duplicate the Background
To avoid too much white open space, duplicate the background layer. You can keep moving stripes of selection on this layer, but it will not affect the background, therefore not create white space.
Be careful not to distort too much of your subject. After all, you don’t want the photo to look unrecognisable. The result should look something like this.
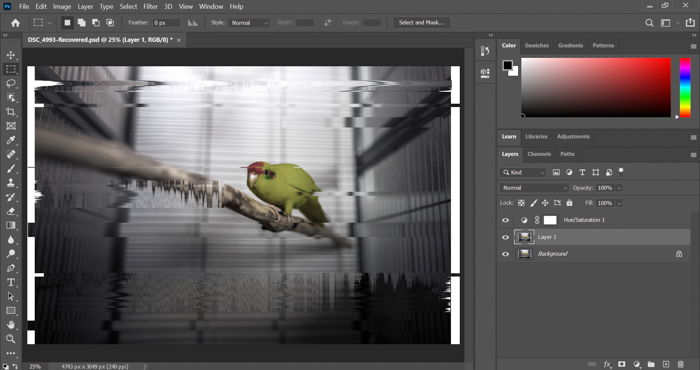
Step Three: Create Wavy Glitch Distortion
Merge the layers again. Once you are done, duplicate the background layer. Use the Rectangular Marquee Tool just like previously. But this time, you will focus on creating a wavy effect on a few bigger parts of the photo.
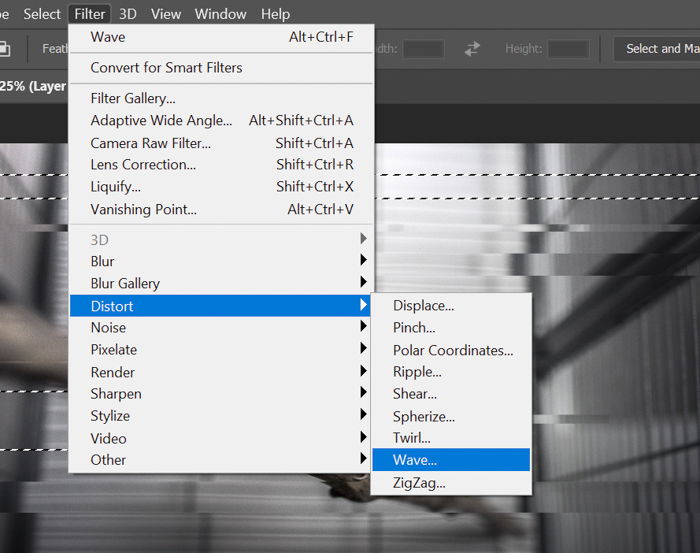
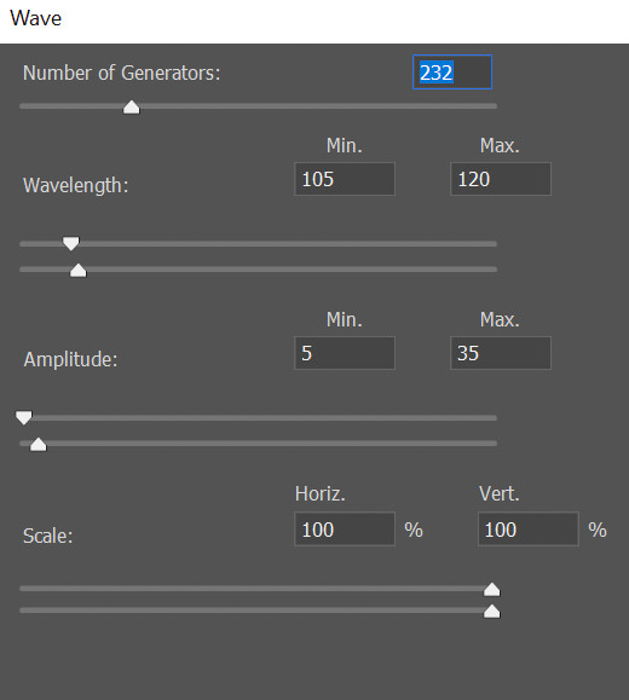
Go to Filter>Distort>Wave. Adjust the settings a bit and check out the result. You will most likely need a few test rounds before you are satisfied with how your glitch effect looks. Don’t be afraid to experiment with the Wave filter; the results will be worth the effort!
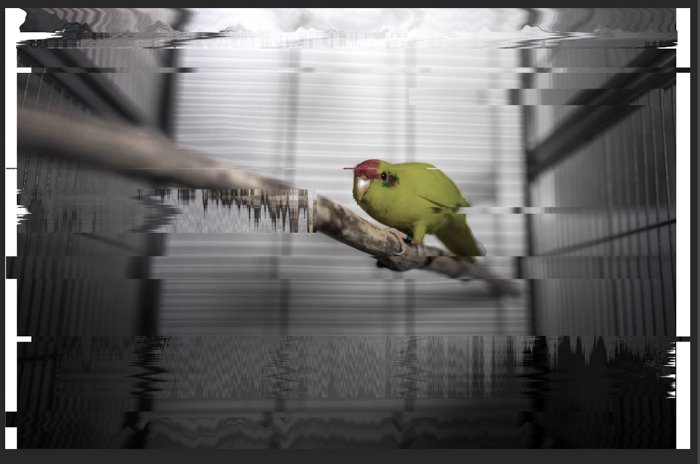
Step Four: Apply the Wave Filter to the Top and Bottom of the Photo
To finish the effect, concentrate on the top and bottom of the picture. Create the selections there and apply a slightly stronger Wave filter.
After this, you can move onto the final step, distorting the colors in Photoshop.
How to Create a 3D Glitch Effect by Color Distortion
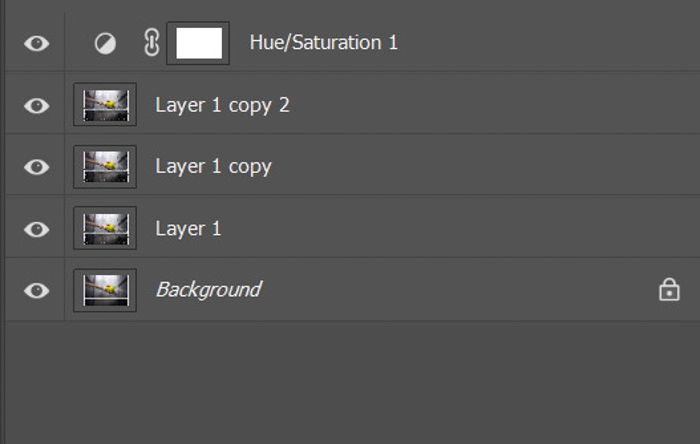
Step One: Duplicate the Layer Two Times
Start by making three copies of the layer that all your adjustments are on. Right-click on the layer and select ‘Duplicate Layer’. Repeat the process one more time. Now you should have three layers apart from the background.
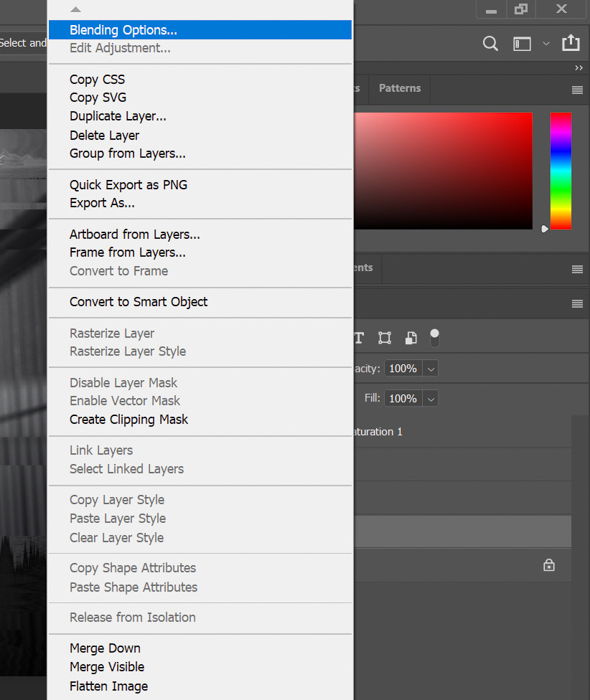
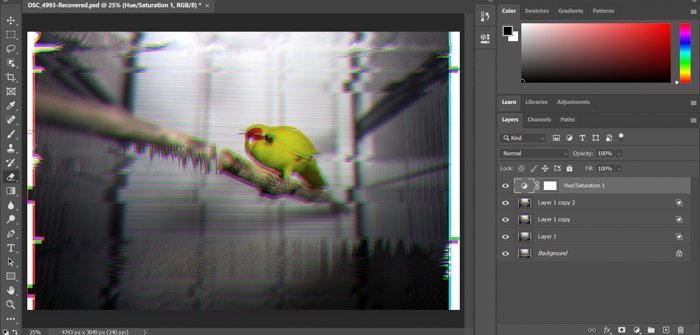
Step Two: Edit the Blending Options for all Three Layers
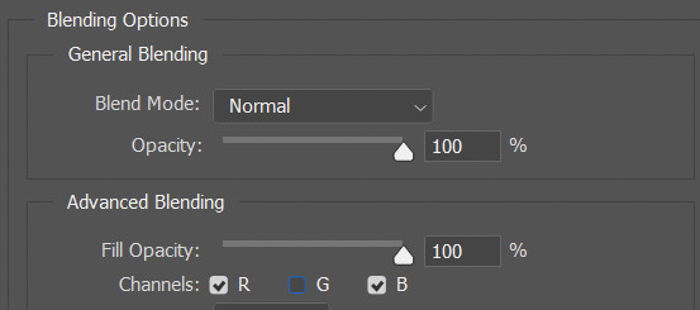
Select the first layer and after right-clicking, choose ‘Blending Options‘. In the Advanced Blending panel’s ‘Channels‘ section, uncheck the G (Green).
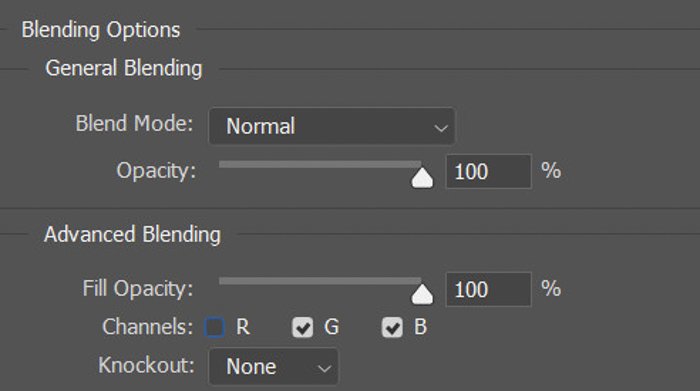
Once you are done, select Layer copy. This time uncheck R (Red).
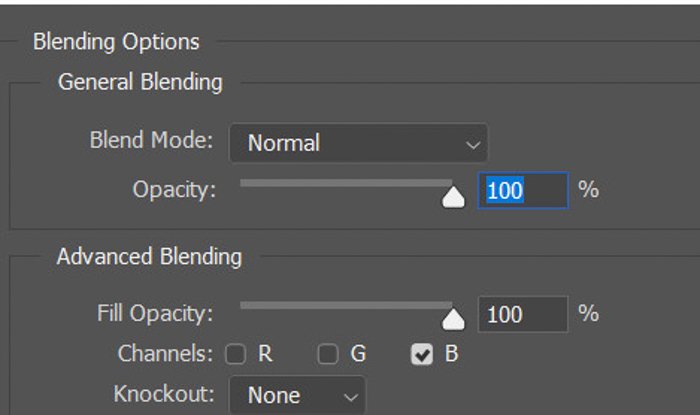
Finally, select Layer copy 2 and uncheck both R and G.
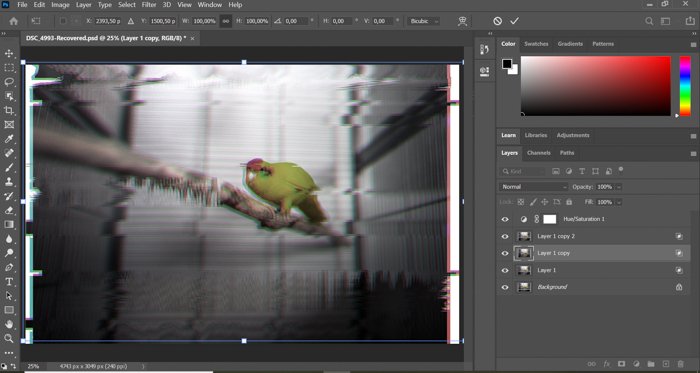
Step Three: Move Each Layer to Create the 3D Glitch Effect
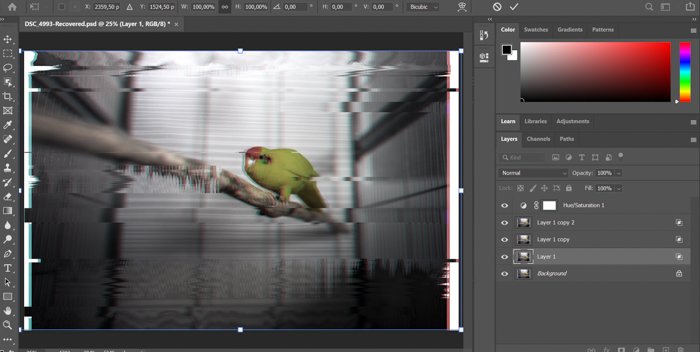
As the final step, all you need to do is to move each layer individually to create the glitch color effect. Select the top layer and press Ctrl+T to be able to free transform it. Use the arrows on your keyboard to move it slightly left.
Now repeat this process with the second layer, but this time move it a little bit right. You can also move it slightly up or down, but be careful with that, because it can quickly ruin the recognisability of your subject.
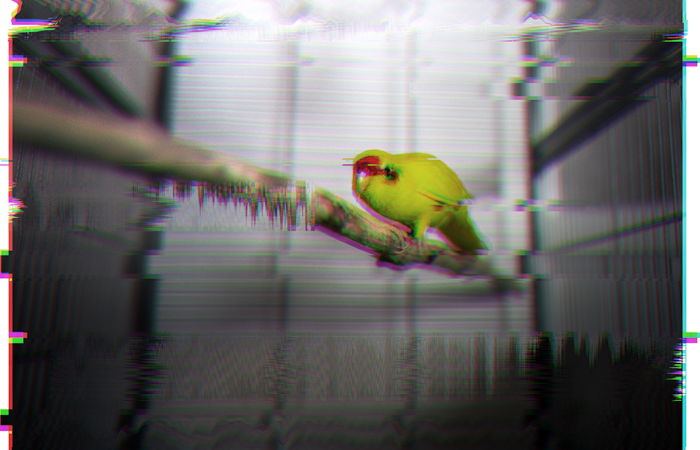
To make the colors pop a little more, I gave the image back a bit of saturation in the end. Here is how the result will look.
Conclusion: Street Photography Quotes
The glitch effect can make your images stand out. It is also an artistic tool that you can experiment with to give your photos a unique look. We hope that this article has helped you with creating a glitch effect in Photoshop! If you liked this article, check out our post about Lighting Effects in Photoshop! You can also find more editing tips and tricks in Effortless Editing with Lightroom.


title: “How To Create A Glitch Effect In Photoshop Step By Step " ShowToc: true date: “2023-01-21” author: “Cara Burgess”
Using the Glitch Effect in Photoshop: What is It?
A glitch is a temporary analog or digital error. It usually appears in television or video games, but it can be found in every area of technology. A glitch is caused by a malfunctioning of a system. Originally, the glitch effect appeared on images with broken data. The appearance of this error consists of jagged lines, colorful pixels, distorted colors, and frozen visuals. You are probably familiar with the looks of the glitch effect, but you might not have imagined that it can be converted into art.
Reasons to Use the Glitch Effect
The glitch effect can be used as an artistic tool to create interesting looks. What makes the glitch effect appealing to our eyes is how it looks familiar, yet it is always different due to its chaotic nature. There is a kind of imperfection in glitches, which is unusual for us, therefore grabs our attention.
How to Create a Glitch Effect In Photoshop
Before creating the glitch effect in Photoshop, you will need to make a few adjustments to the original image to make it look more authentic.
How to Prepare for Creating the Glitch Effect
Step One: Find and Open a Suitable Photo
To create a glitch effect in Photoshop, it is best if the subject has clear edges. It is also useful if the background has distinct lines. Once those lines are distorted, it will make the effect stand out more. Open Photoshop and drag the photo into the programme.
Step Two: Make a Selection of Your Subject
Choose the Quick Selection Tool in the left sidebar. In case you can’t find it, right-click the Object Selection Tool first.
With the Quick Selection, select your subject. This can be a human if you are working with a portrait. For me, it will be the yellow parrot. You can also refine the edges if you are looking for a smoother selection.
Step Three: Create a New Layer of Your Subject
By right-clicking the selection, choose ‘Layer Via Copy’. This will be necessary because you will have to make a few adjustments to your subject alone.
Step Four: Use the Crop Tool to Expose Some White Background
Select the Crop Tool on the left and pull both sides a little out so that you expose two stripes of the white background. Later this white will help you create the glitch in Photoshop.
Step Five: Edit Saturation and Contrast
You need to adjust the saturation for a more monochromatic look. Go to the right corner, under the layers panel, and click ‘Create new fill or adjustment layer’. Choose Hue/Saturation. This will create a new adjustment layer that will appear above the other layers.
Grab the Saturation slider and drag it to the left until you have barely any colors on the photo. You also will have to give your subject some contrast to reach the desired effect. To do so, select the layer that only contains the selection of the subject. Go to Filter> Camera Raw Filter and use the sliders on the right to achieve more contrast. Once you are done, press the enter on your keyboard.
The reason we are doing saturation on a separate layer, unlike contrast, is that an adjustment layer lets you edit that specific adjustment any time later on. After you are finished with creating the glitch effect, you might think that you have to add or remove more saturation. You can easily do so by editing this saturation slider.
Step Six: Merge Layers
Now that you have edited the subject layer separately, you can merge it with the background. Select both layers by clicking on them while holding Ctrl on your keyboard. Right-click on the layers and select ‘Merge Layers’.
We are done with the preparation part; let’s get onto creating the glitch effect!
How to Create the Glitch Distortion
A glitch consists of many effects, from distorted lines to inverted colors. Therefore, to reach the glitch effect in Photoshop, you need to use several tools that I will explain below.
Step One: Use the Rectangular Marquee Tool
Select the Rectangular Marquee Tool on the left sidebar and use it to create two thin selections on the top and bottom of the photo. Make the first selection, then press Shift on your keyboard to be able to make the other one simultaneously. Right-click the selection and choose “Layer Via Cut”.
Press Ctrl+T to be able to free transform the selected area. Use the arrows on your keyboard to move the stripes left or right. You will see some of the white background being exposed.
Repeat this process a few times with selections of different size. After you are done, merge the newly created layers with the background.
Step Two: Duplicate the Background
To avoid too much white open space, duplicate the background layer. You can keep moving stripes of selection on this layer, but it will not affect the background, therefore not create white space.
Be careful not to distort too much of your subject. After all, you don’t want the photo to look unrecognisable. The result should look something like this.
Step Three: Create Wavy Glitch Distortion
Merge the layers again. Once you are done, duplicate the background layer. Use the Rectangular Marquee Tool just like previously. But this time, you will focus on creating a wavy effect on a few bigger parts of the photo.
Go to Filter>Distort>Wave. Adjust the settings a bit and check out the result. You will most likely need a few test rounds before you are satisfied with how your glitch effect looks. Don’t be afraid to experiment with the Wave filter; the results will be worth the effort!
Step Four: Apply the Wave Filter to the Top and Bottom of the Photo
To finish the effect, concentrate on the top and bottom of the picture. Create the selections there and apply a slightly stronger Wave filter.
After this, you can move onto the final step, distorting the colors in Photoshop.
How to Create a 3D Glitch Effect by Color Distortion
Step One: Duplicate the Layer Two Times
Start by making three copies of the layer that all your adjustments are on. Right-click on the layer and select ‘Duplicate Layer’. Repeat the process one more time. Now you should have three layers apart from the background.
Step Two: Edit the Blending Options for all Three Layers
Select the first layer and after right-clicking, choose ‘Blending Options‘. In the Advanced Blending panel’s ‘Channels‘ section, uncheck the G (Green).
Once you are done, select Layer copy. This time uncheck R (Red).
Finally, select Layer copy 2 and uncheck both R and G.
Step Three: Move Each Layer to Create the 3D Glitch Effect
As the final step, all you need to do is to move each layer individually to create the glitch color effect. Select the top layer and press Ctrl+T to be able to free transform it. Use the arrows on your keyboard to move it slightly left.
Now repeat this process with the second layer, but this time move it a little bit right. You can also move it slightly up or down, but be careful with that, because it can quickly ruin the recognisability of your subject.
To make the colors pop a little more, I gave the image back a bit of saturation in the end. Here is how the result will look.
Conclusion: Street Photography Quotes
The glitch effect can make your images stand out. It is also an artistic tool that you can experiment with to give your photos a unique look. We hope that this article has helped you with creating a glitch effect in Photoshop! If you liked this article, check out our post about Lighting Effects in Photoshop! You can also find more editing tips and tricks in Effortless Editing with Lightroom.
