Sometimes you end up taking photos where the background distracts from your subject. This article will teach you how to blur the background in Lightroom in the post-processing stage in exactly such cases. [ExpertPhotography is supported by readers. Product links on ExpertPhotography are referral links. If you use one of these and buy something, we make a little bit of money. Need more info? See how it all works here.]
How to Blur the Background in Lightroom: A Word Before You Go
Of course, it’s always easier if you don’t need to make this adjustment in post at all. Getting it right at the time of shooting can save you the work. The sooner you learn to pay attention to a subject’s surroundings while shooting, the better. In general:
- If the subject is in the background, the foreground must contain an element of interest.
- If the subject is in the foreground, the background should not be so distracting as to divert the viewer’s eyes. Sometimes it is possible to fix things up in post-production. You can add interesting elements in the foreground, thus creating a composite image. Or you can blur the background so it’s less distracting and make your subject stands out more. Read on to learn how to blur a distracting background in Adobe Lightroom. And if you are interested to know more about how to get it right in camera, check out the bonus section at the end.
Fixing the Background in Post-Production
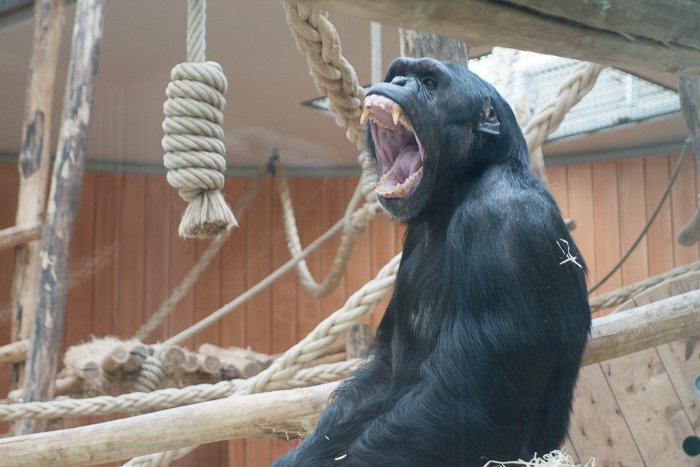
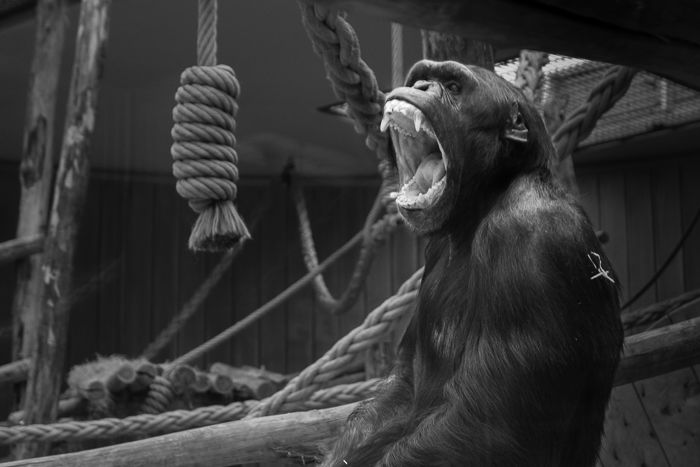
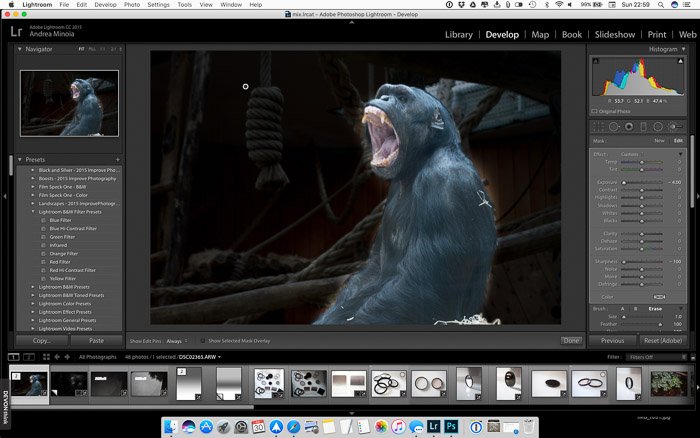
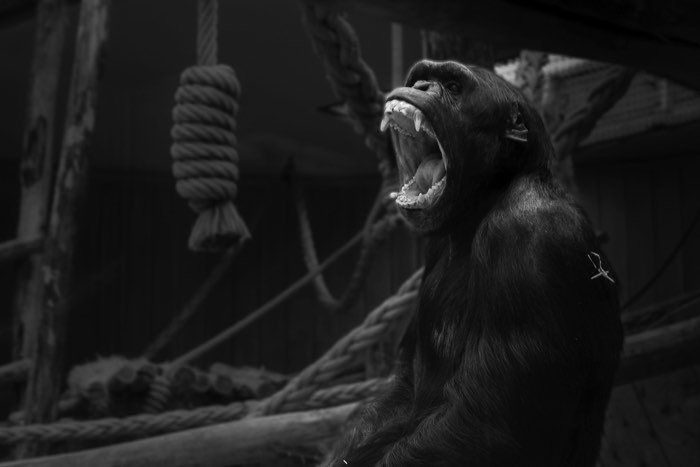
Let’s consider this image of a gorilla I shot at a zoo using my Sony RX100 Mark II compact camera. This Sony is a great walk-around camera. The only downside is the unimpressive f/4.9 minimum aperture value when zooming all the way in. This is not ideal for creating impressive background blur. I tried to convert this image to black and white. With all the ropes and wood, the background is still distracting and the gorilla gets lost in it. Let’s fix this using a digital blur effect to create a blurred background.
Blurring the Background in Lightroom
Despite preferring to use Photoshop for these kinds of jobs, I reckon Adobe Lightroom is quite capable of blurring the background. It’s particularly useful if you have a slightly blurred background to begin with. With no tools to help you mask the background, you have to manually create one by painting the background with an adjustment brush. I like to use the brush tool for this.
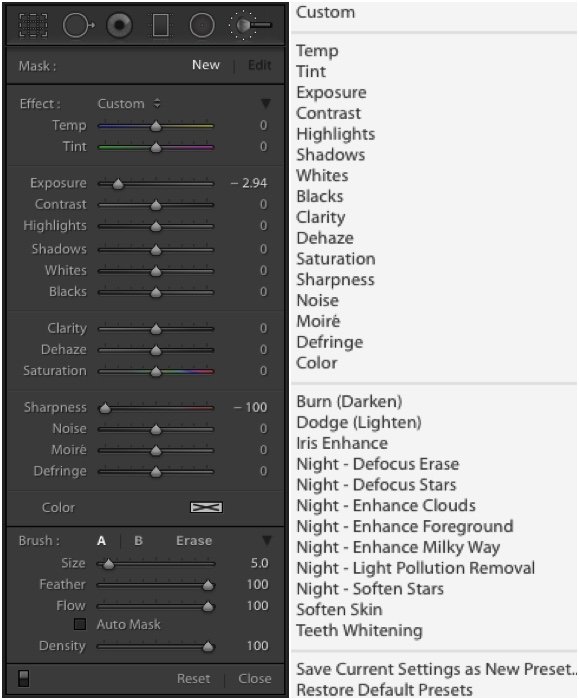
Lightroom Brush Tool
Open the Develop Module of Lightroom if you haven’t yet done so. The brush tool is used to apply an effect to a part of your image.
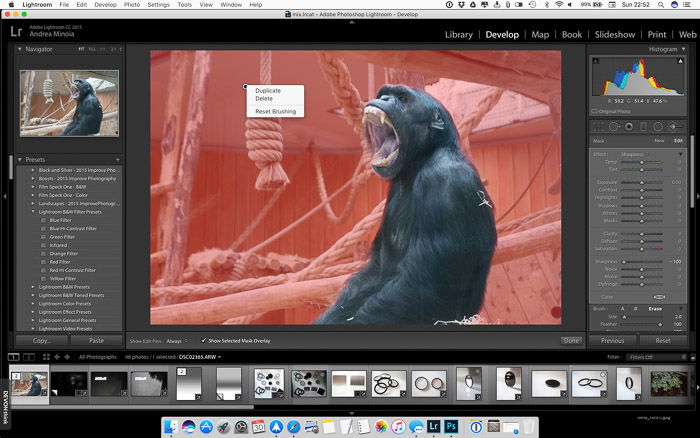
The mask part of the brush panel lets you create a new mask or edit an existing one. In the Effect section of the panel, you can choose a preset or manually create your effect
The Brush section of the panel lets you define effects for two brushes The brush properties can be changed at any time and will have no effect on the parts already painted. Size: sets the relative size Feather: sets how soft or hard the brush is Flow: sets the strength for the brush. Use a value lower than 100 to slowly build up the effect while painting on the same area Auto Mask: toggle on to help you to follow borders when you paint Density: sets a cap for the max strength of the brush
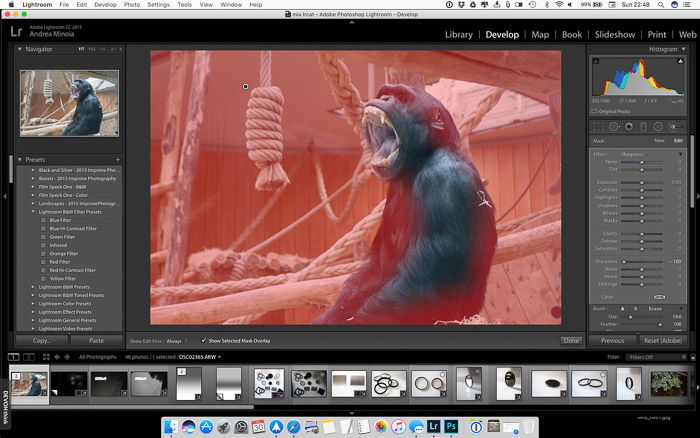
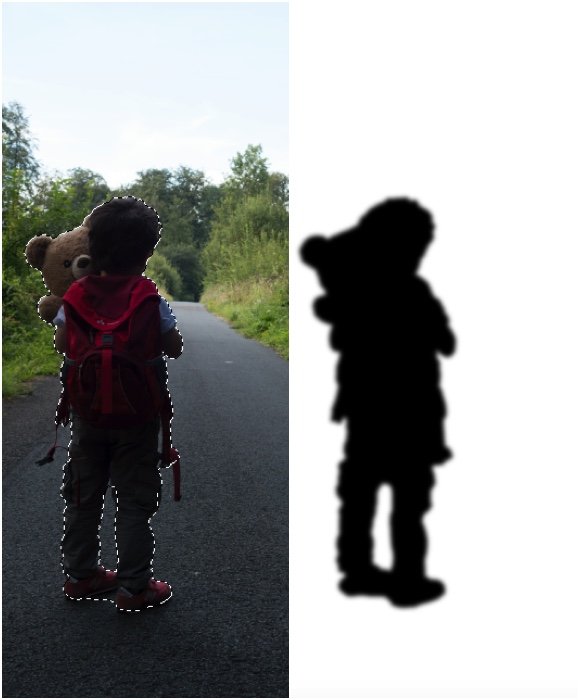
How To Select the Background
Begin by selecting a sharpening adjustment brush tool. Then crank the sharpening slider all the way to -100 and start painting over the background. You do not need to be precise at this stage. Use the keyboard shortcut ‘O’ to show or hide the selected mask overlay (displayed in red). This way, you’ll see better where you are painting. While the mask overlay is on, the brush effect on the image is not shown.
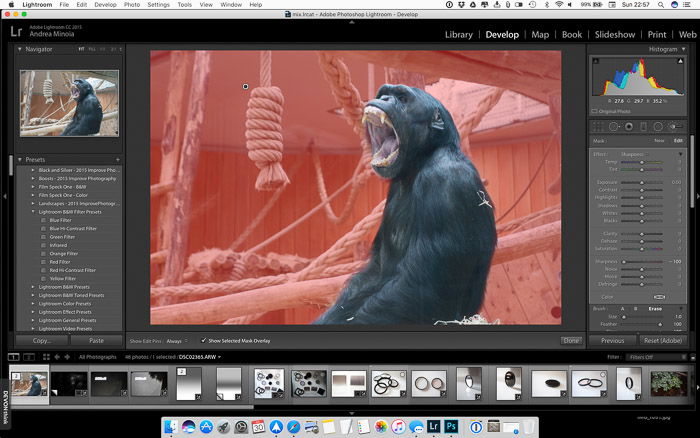
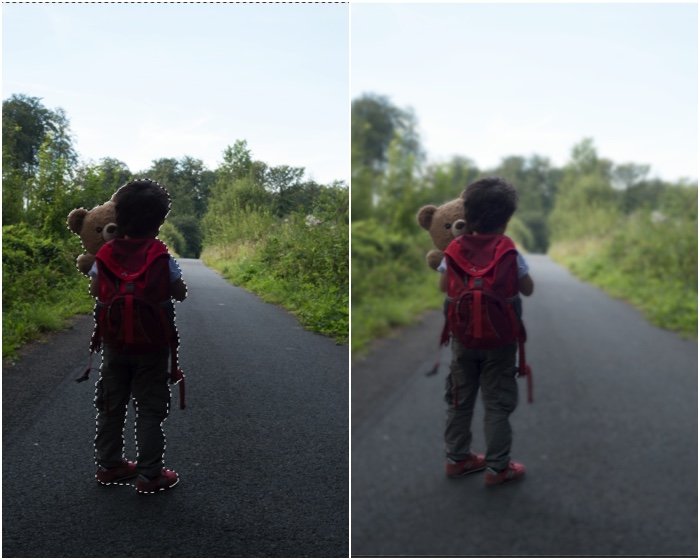
Once you have a coarse mask, start working around the edges. Tune the Size/Flow/Density and Feather for your brush to refine the mask edges. Sometimes, the Auto Mask option can help you in this. Eventually, you will need to use the Erase brush to clean up your subject. That’ll ensure that the blur effect is applied only to the background. Tip: For realistic blur, remember that the amount of blur is gradual and increases with the distance from the focal plane. All the objects on the focal plane must be kept sharp. After a long paint/erase process, you end up with a pretty decent mask.
How to Increase the Amount of Blur
Setting the Sharpness to -100 did introduce a certain amount of lens blur, but not much. The good thing about Lightroom is that you can duplicate your adjustment brush by simply right-clicking on the brush marker and selecting ‘Duplicate’.
This new brush has the same settings and mask as the previous one. Be sure all the sliders are set to zero except Sharpness, which must be set to -100. From now on duplicate the brush as much as you need to apply the blur and build up the blur effect you are after. Warning: Having many adjustment brushes in an image will slow down Adobe Lightroom.
The Final Retouch
After having finished blurring the background, you can now duplicate the brush one last time, slightly reducing the clarity (set the sharpness back to zero) to accentuate the blur. Next, you can use the global settings or other selective adjustment tools to make the final adjustments to your image. When you are happy with your image, the only thing left to do to is export the photo and share the results of your hard work.
Digital Blur Isn’t Always Ideal
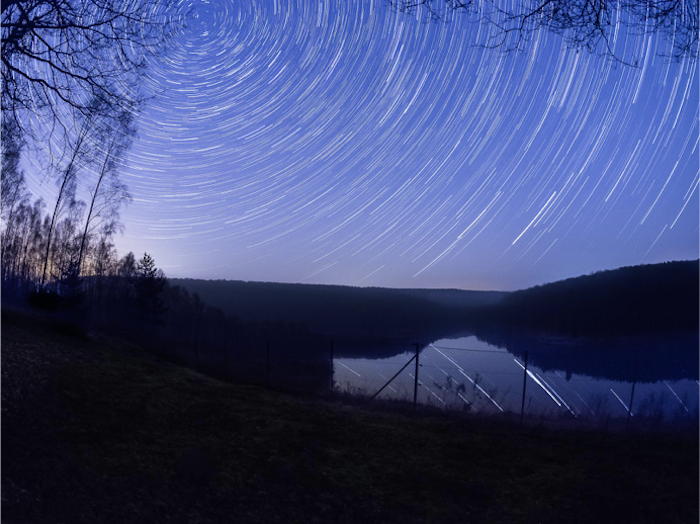
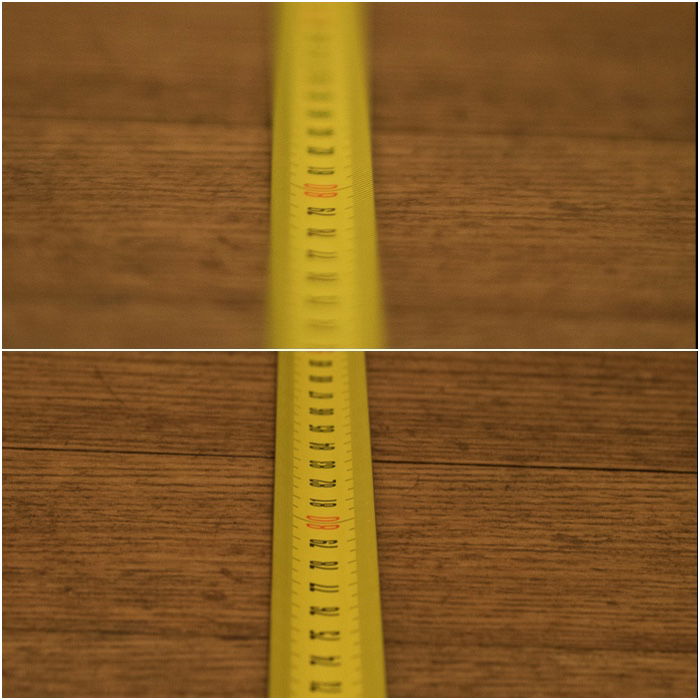
The main difficulty in creating a realistic digital blur effect lies in reproducing the gradual increase of the blur as it gets further from the focal plane, as seen in the example below.
Bonus: How to Get Blur Right In-Camera
Your camera sensor size will affect the depth of field (DoF). For a given combination of focal length, aperture and subject distance small sensors give higher DoF than larger sensors. The DoF can be modified as follows:
Aperture: double the f-number (e.g. move from f/4 to f/8) and the DoF is also doubled Subject distance: double it and the DoF increases by a factor of four Focal length: double it and the DoF is reduced by a factor of four
If you want to maximise DoF, so that most of your landscape will be sharp, then you should use high f-numbers, short focal length, and focus reasonably far away. A general rule of thumb says you should focus 1/3 into the scene. If you want to minimise the DoF, to better isolate your subject from the background and have nice bokeh, then you should use small f-numbers, long focal length, and move closer to your subject. Tip: If you are shooting portraits with natural light while outdoors, you can keep shooting wide open with fast lenses by using a 2 or 3 stop neutral density filter. Finally, if you cannot reduce your DoF further but still need to blur the background, your last option is to increase the subject-to-background distance, if possible.
Conclusion
So here’s our solution to create a beautifully blurred background. Don’t forget to minimise your depth of field by using the widest aperture. In this way, you can reach an even separation between your subject and the background without any editing! For more Lightroom knowledge, check out Effortless Editing in Lightroom!