And it has another advantage: all the images from the same series will look like they belong together. This level of consistency is difficult to achieve when you edit your photos individually. The below tips will teach you how to batch edit in Lightroom. [ExpertPhotography is supported by readers. Product links on ExpertPhotography are referral links. If you use one of these and buy something, we make a little bit of money. Need more info? See how it all works here.]
How to Batch Edit in Lightroom During Import
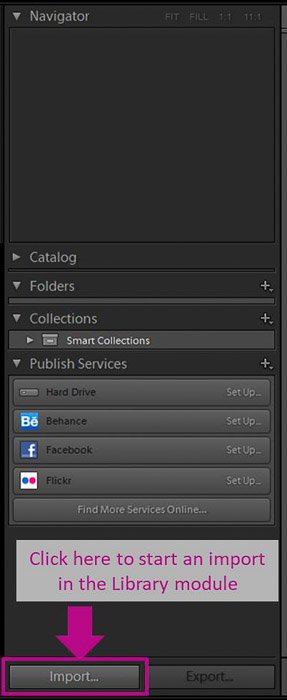
If your photos are similar and you’re sure that you will apply the same preset to all of them, you can do it as you import the photos to the catalog. To do so, start an import in the Library module. Check our detailed guide if you want to learn more about how to import photos.
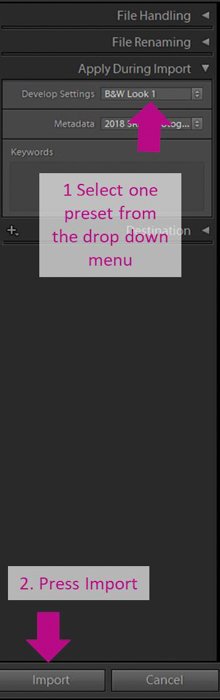
Then go to the ‘Apply During Import’ panel. Select the preset you want to apply in the ‘Develop’ settings dialogue. You won’t be able to see a preview of the image. So you need to be sure beforehand that the preset will work. Lightroom will automatically apply the preset while importing. The import will take more time, especially if you are importing a big amount of photos for batch processing.
Keep in mind that you can’t undo the action once the photos are imported. If the preset was not the right one, you will need to either correct all the images or delete them from the Lightroom Catalog and start all over again. You might want to import one photo first and experiment with it before doing the main import. You can also find a lot of tips on how to process your images in our course Effortless Editing with Lightroom.
How to Batch Edit in Lightroom
How to Apply Presets to Multiple Images in the Library Module
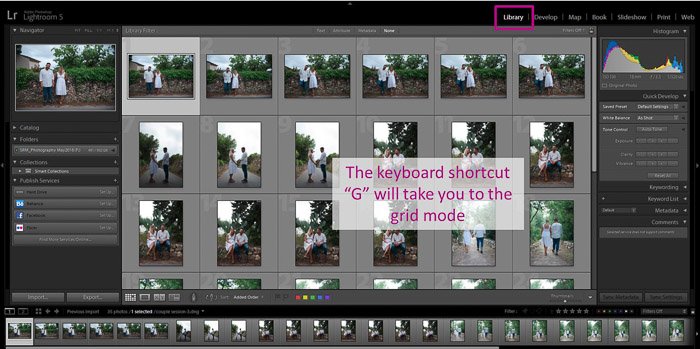
In case you don’t want to apply the presets during import, you have several other options. The first one is applying Lightroom presets using the Library module. Once you’ve finished importing all your photos, go to the ‘Library Grid’ mode. This is important because batch editing won’t work otherwise.
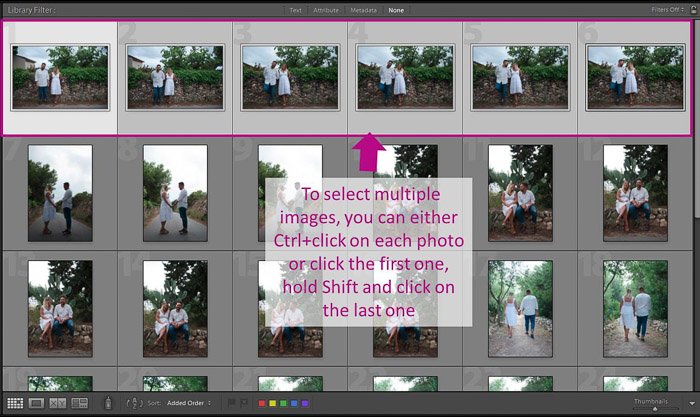
Select all the photos in Lightroom that you want to edit. To quickly select multiple images, you can Ctrl+click on each photo. Or you can click the first one, hold ‘Shift’ and click on the last one.
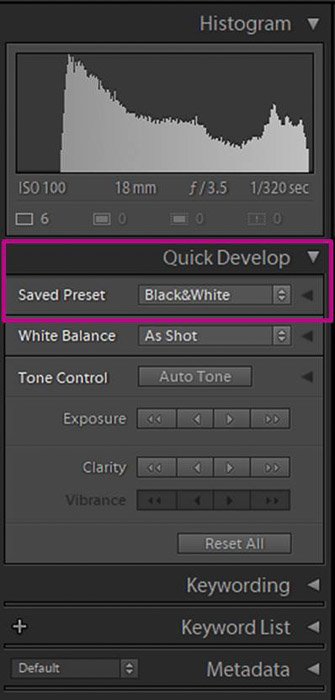
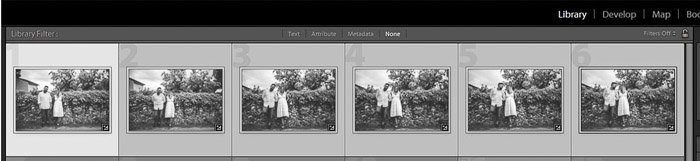
In the ‘Quick Develop’ panel, select a ‘Saved Preset’ in the drop-down menu.
Lightroom will update all photos with the selected preset.
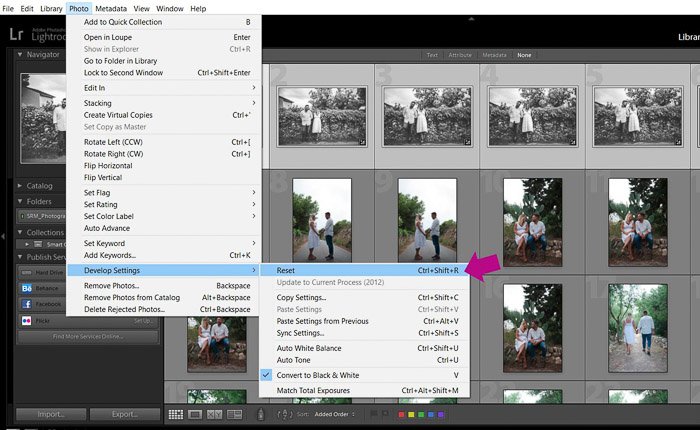
As in the previous option (during import), there is no preview option. You need to be sure of the preset you want to apply. If you’ve made a mistake and the preset is not working well, you can undo it by going to ‘Photo>Develop settings>Reset’. You can also use the keyboard shortcut ‘Ctrl+Shift+R’.
How to Paste From Previous To Copy All the Settings
This option will allow you to work on one photo before applying the ‘Develop’ settings to the whole batch. You can either apply a preset or make your own. It is quite common to combine a preset with your personal edits and adjustments.
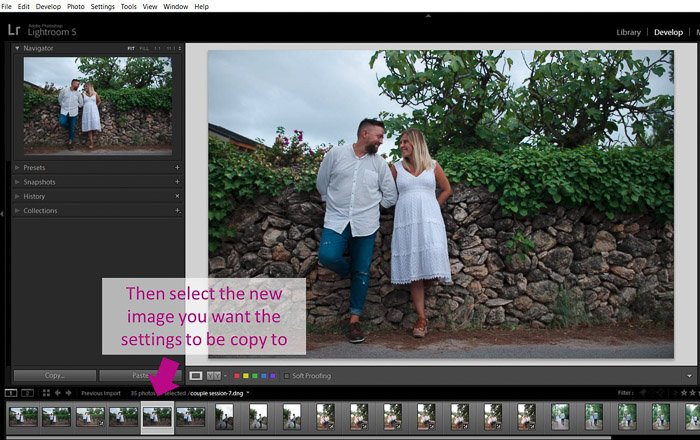
Once you have all the edits you want, you just need to select the new photo you want to copy the settings to.
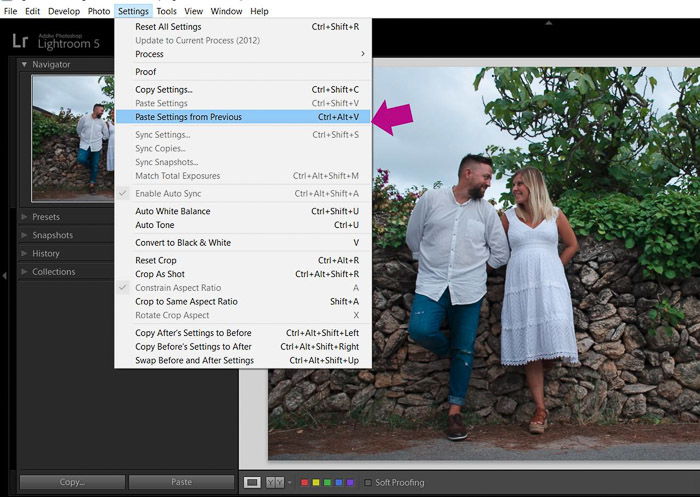
Go to ‘Settings>Paste’ from previous or use the shortcut ‘Ctrl+Alt+V’.
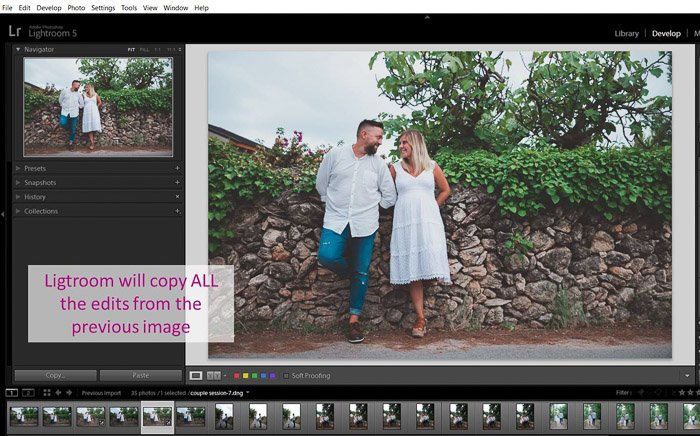
Lightroom will copy all the settings from the previously selected image. Make sure that the previous image is the one you’ve edited.
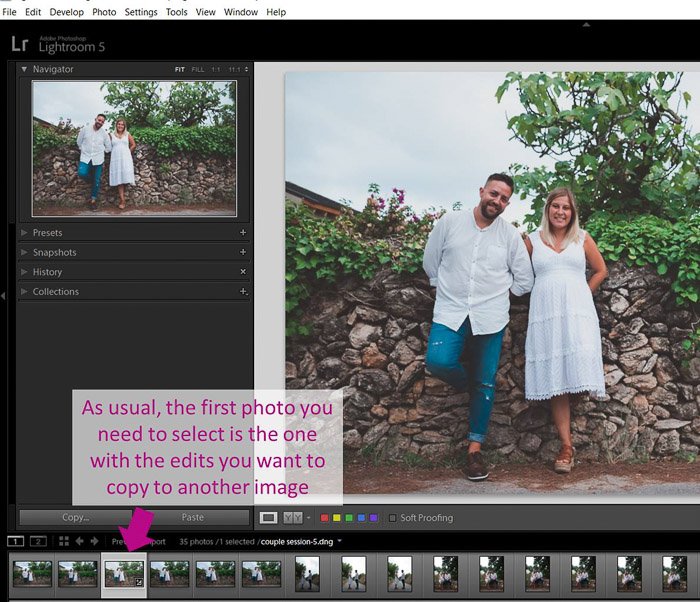
How to Copy Only a Selection of Settings
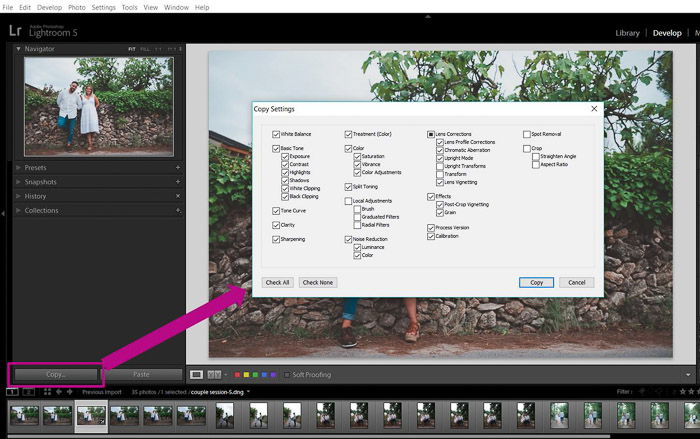
If you want to selectively copy just some of the adjustments and edits you’ve made, you can do that using the ‘Copy’ button in the ‘Develop’ module. The first thing you need to do is select the photo that you want to copy the adjustment from.
Then click ‘Copy’ and a window will appear. This window has all the settings you can copy to another photo. Now you need to select the settings you want to copy by clicking on the boxes next to them and press ‘Copy’.
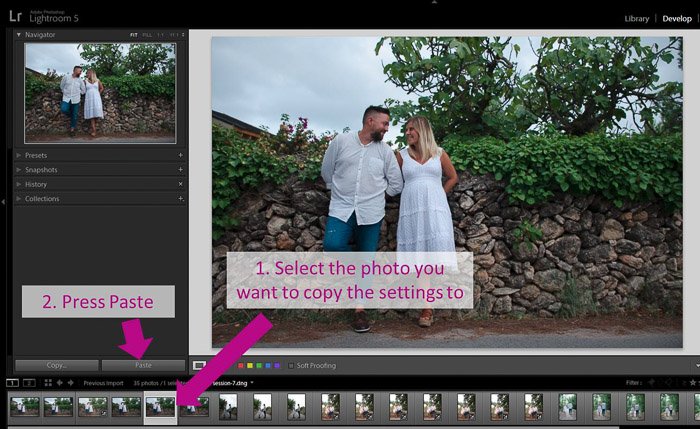
If all the photos are similar, you can copy them all. I usually copy all but the exposure because it is particular in each image. You can even crop multiple photos at once if you check the ‘Crop’ box. Select the new photo and click ‘Paste’.
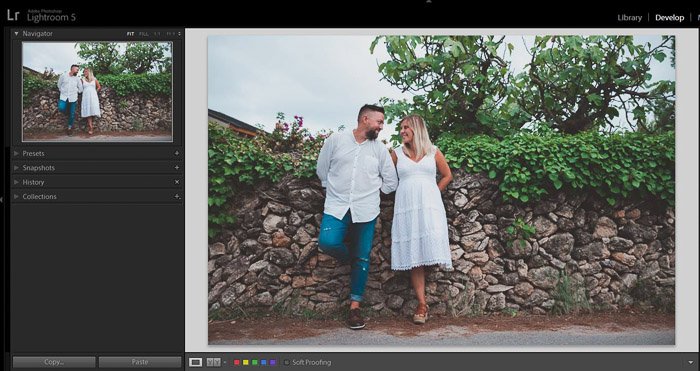
Lightroom will paste all the settings from the edited photo to the new one.
How to Fast Batch Edit With the Synchronisation Option
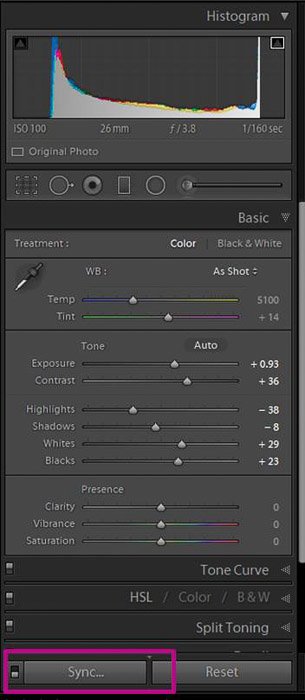
One of the most common ways to batch edit photos in Lightroom is with the ‘Synchronise’ option of the ‘Develop’ module. This allows you to copy the edits from one image to multiple images instead of just to one as in options 3 and 4. Select the image with the edits that you want to copy.
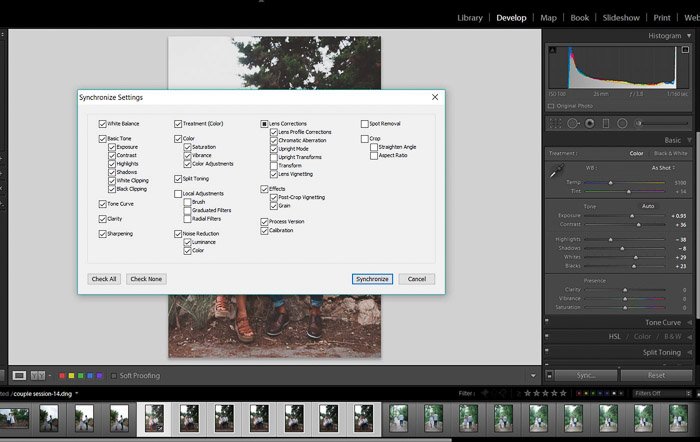
Then select all the photos in Lightroom you want to copy the edits onto. The selection order is important because Lightroom will recognise the first image you’ve selected as the one to copy the edits from. I find it handy to select the edited image, hold ‘Shift’ in the keyword and then click on the last photo in the series.
Press the button ‘Sync’ in the ‘Develop’ module. Or go to ‘Settings>Sync’ settings, or use the keyboard shortcut ‘Ctrl+Shift+S’.
The ‘Synchronise Settings’ windows will open. You can then select the settings you want to synchronise.
Press ‘Synchronise’ and you will see as Lightroom edits all the selected photos.
If at some moment you moved from the ‘Develop’ module to the Library, you can also ‘Synchronise’ from there. Make sure you have the images selected and press the ‘Sync Settings’ button. Or right-click with your mouse, select ‘Develop settings> Sync settings’.
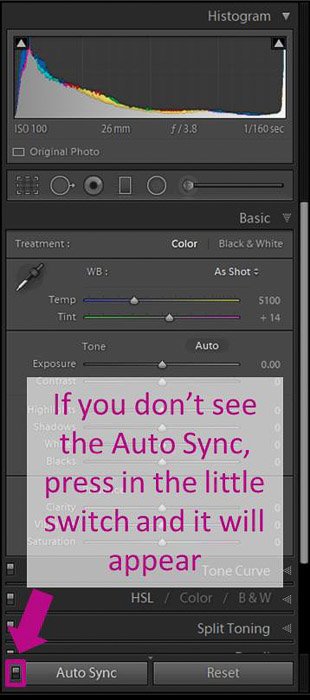
How to Use Automatic Synchronisation for Batch Processing
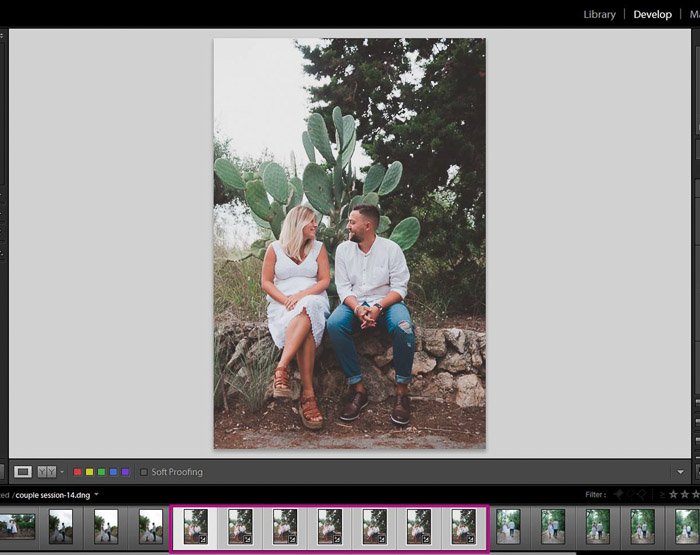
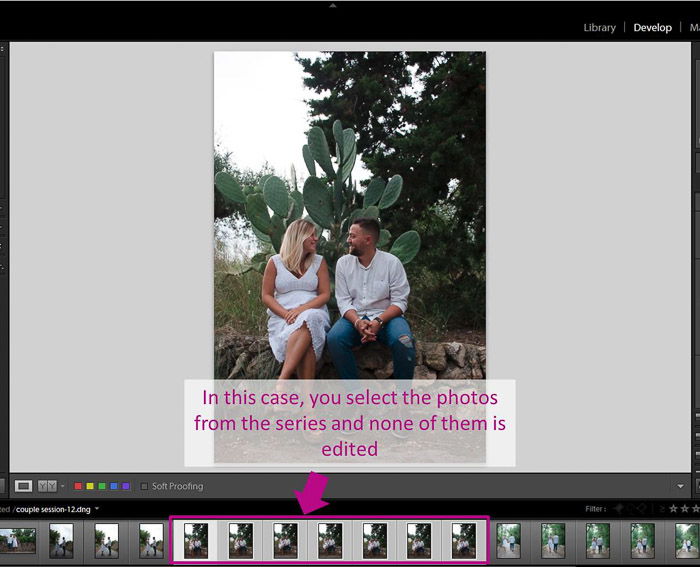
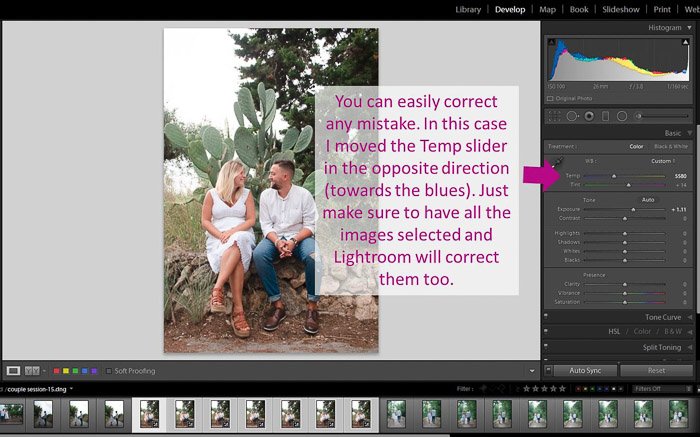
The ‘Sync’ option is a great way to batch edit photos in Lightroom. But it has a limitation because the sync tool only synchronises the adjustments that have already been made. If you need to do some extra editing, you will need to sync the image again. If you want to have the option to update all photos simultaneously as you work on one image, you can use automatic synchronisation. In this case, you won’t start by editing the first photo. Instead, you need to select all the photos in the series in the ‘Develop’ module.
Then you check ‘Auto Sync’. To visualise this option, you need to turn on the little switch next to the ‘Sync’ button.
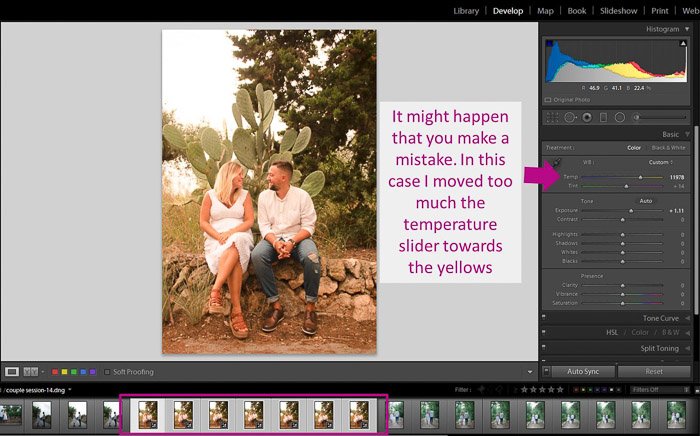
Once you’ve done that, you will see the first photo you’ve selected in full view instead. This way you can edit that photo in detail. You will be able to see that the programme is updating the changes for all the selected images.
If you make a mistake and edit something in a way you don’t like, don’t worry. You can easily correct it by readjusting the edit tool or going back as you usually do when editing a single image.
How to Batch Edit With Metadata
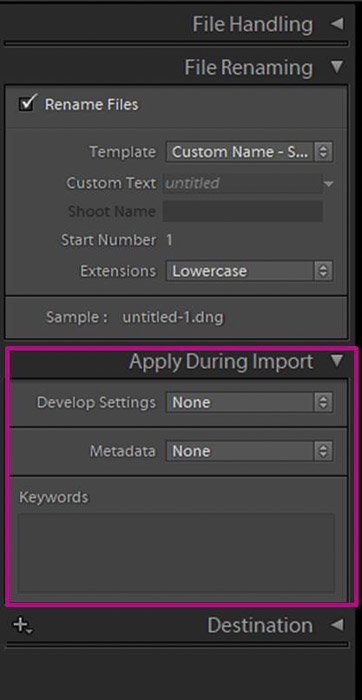
Batch editing can also be extremely useful when working with metadata. This is all the information written by the camera in the image file such as date, time, lens settings etc. You can add other types of useful data such as keywords, your name, contact information and copyrights. This is a highly recommended thing to do, but it is also tedious work. Lightroom allows you to sync your metadata in a similar way as with the edit settings. Just as with presets, you can do it during the import in the ‘Apply During Import’ menu.
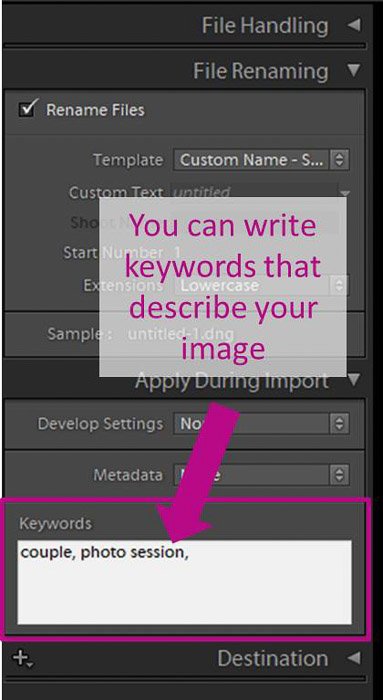
Now you can write as many keywords as you want.
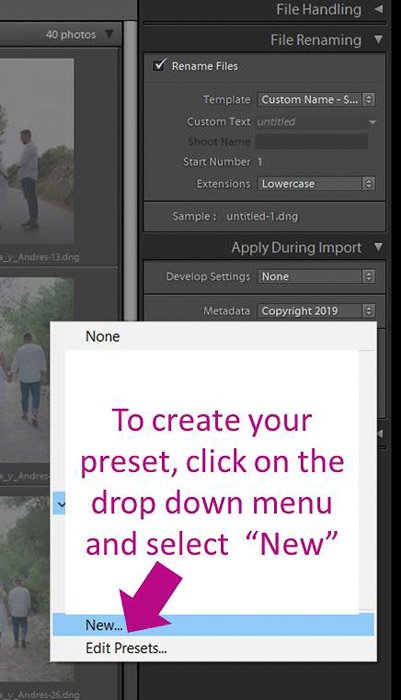
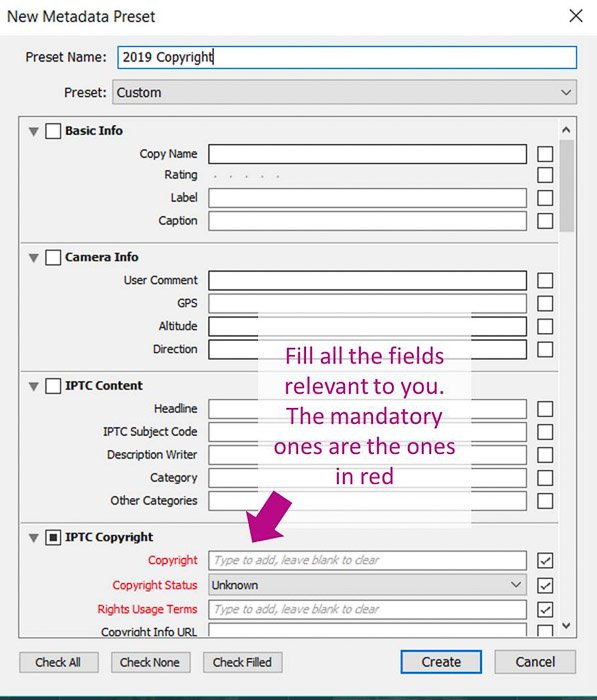
You can also apply a metadata preset. If you do not have one, it is really easy to create. First, select ‘New’ from the drop-down menu in Metadata.
A window will open with a lot of fields where you can add information about your image. Mandatory fields are marked in red.
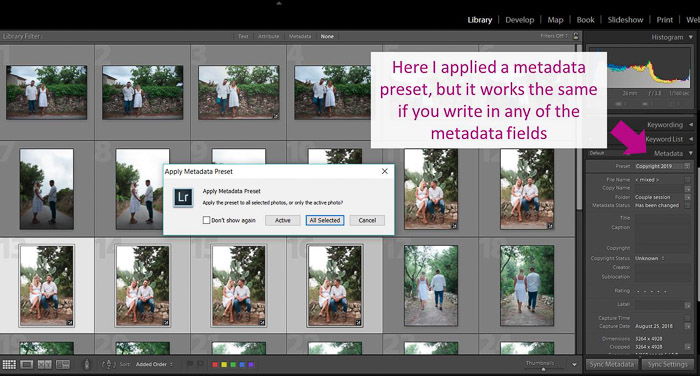
Fill in as many fields as you consider necessary, then decide on a preset name and click ‘Create’. You can also add metadata to multiple images from the ‘Grid’ view of the Library module. Select the photos (in the grid, not in the filmstrip) and enter the metadata in the menu. You can also apply a metadata preset to your photos if you have one. Lightroom will apply the metadata to all the selected photos- it even warns you it is going to do it.
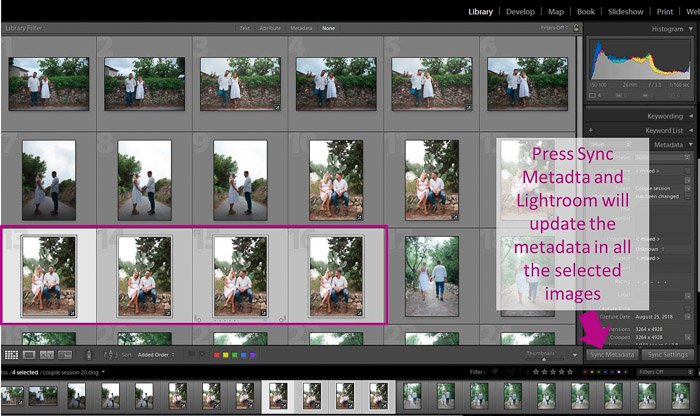
Another approach is to add the metadata to just one photo and then copy it onto other photos. While keeping the photo you’ve added the metadata, select the other images. Click the ‘Sync’ button and a window will open with the metadata options.
Choose the fields you want to be copied and click ‘Synchronise’. Lightroom will update all the selected images.
How to Batch Edit in Lightroom Mobile
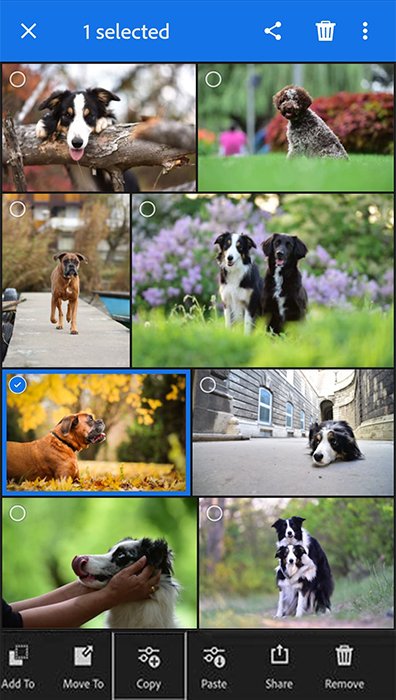
Batch editing is a feature that has only recently been added to the mobile version of Lightroom. All it takes is a few simple steps to accomplish syncing. First, open the image folder you want to edit photos from. Long press on a picture that you want to copy the editing settings of. Once you selected the photo, click ‘Copy’ on the bottom of the screen. After this, all you need to do is to select all the images that you want to apply these settings to. Click ‘Paste’ on the bottom of the screen and tap ‘Done’. Your selected photos now should all be edited with the same adjustments.
Conclusion
Lightroom offers several options for batch editing to make your workflow more efficient. It will also help you keep a consistent look throughout your photos. Remember that each photo might be slightly different in origin. Go back to each one and check if its adjustments need some fine-tuning. Even with that bit of extra work, batch editing is a real time saver and can cut your editing workflow time in half.