But outdoor wedding photography comes with its own set of challenges. These include uneven lighting, bright sun, dark shadows, and, of course, the weather. From planning ahead to anticipating the different challenges, these 10 outdoor wedding photography tips help make the most of outdoor events. [ExpertPhotography is supported by readers. Product links on ExpertPhotography are referral links. If you use one of these and buy something, we make a little bit of money. Need more info? See how it all works here.]
Tips for Outdoor Wedding Photography: Advising the Bride and Groom on the Best Times of Day for Wedding Photos
Capturing great photos during an outdoor wedding starts well before the big day. Months before, in fact. During the early meetings with the bride and groom, you should offer advice on setting up the ceremony for the best light. It’s not your job to plan the wedding. But offering advice on the time of day or location that will work best for outdoor photos is helpful. Let the bride and groom know that noon is the worst time to take pictures outdoors. Shooting later in the day is often more ideal. The timeline can be more flexible, however, if the outdoor wedding is in full shade. Another thing to keep in mind? Make sure you’ll have enough light left to capture all the formal photos before sunset. It’s up to the couple to make the decision as to where and when to have their ceremony. But most non-photographers have no idea that a noon ceremony with no shade is a bad idea. Offering tips and insight before the timeline is finalized can make a big difference. Accept when the ceremony can’t be moved to the shade or to a later time. But offer insight during the planning process so the couple can make an informed decision as they plan their day.
How to Prepare for Any Weather Conditions
Outdoor weddings can be spectacular ceremonies with golden light. Or they can be cold, rainy and moved into a tent at the last minute. As the photographer, you should come prepared for the elements. Pack extra layers to stay warm and wear shoes that can be worn over rough terrain. Keeping sunscreen on bug spray on hand is a great idea as well. Preparing for the rain is key. A poncho and a camera rain cover won’t take up much room in your bag. But they can be lifesavers on a rainy wedding day. Many wedding photographers even invest in enough umbrellas to still shoot outdoors with the entire wedding party. For winter weddings, plan ahead for the colder temperatures. The cold tends to drain batteries much faster. Even if you’ve never used a backup battery at a summer wedding, a winter wedding may drain that battery even before the reception begins.
Use Fill Flash to Compensate for Bad Lighting
Before the ceremony starts, note where the light is coming from. Find the best places to stand to capture the best light. One of the great things about outdoor weddings is that the photographer has a little more freedom to move around. Look for the angles that will both capture the moments and provide the best light. Find the tricky lighting before the ceremony starts so you can decide how to tackle it. For example, does the aisle have sections of sun and sections of shade? You may want to time the aisle shots for when the bride is in the shade. Or at the very least be prepared to adjust the exposure settings from the sun to the shade. Flash is often just as essential to outdoor weddings as indoor weddings. If the wedding is in the shade, on a cloudy day or during golden hour, the flash isn’t necessary. But on a sunny day or shooting towards mid-day, using flash can fill out under-eye shadows created by bad lighting. Or it can create a more even image when working with backlighting. Understanding how to use and modify a flash to blend in with the ambient light is an essential skill for wedding photography. Some wedding days may not need a flash at all, others will be improved by adding even just a simple fill flash.
Keep the Highlights in Check When Setting the Exposure
An outdoor wedding ceremony tends to have more uneven lighting than an indoor ceremony, which can make setting the exposure a bit trickier. When dialing in your camera settings, err on the side of underexposure. It’s better to have dark shadows then to blow out the highlights. No amount of post-processing can bring them back. If you can’t see the details in the bride’s white dress, your exposure is too bright. In outdoor venues with uneven lighting, a semi-manual mode may be more appropriate than shooting on full manual. Using auto ISO inside manual mode, or using shutter or aperture priority mode will allow you to keep up with the changing lighting. Whether that’s a cloud going over the sun or the bride moving in and out of the shade in her walk down the aisle. If you use a semi-manual mode, be sure to switch to a spot weighted metering mode. Some camera brands also have a highlight priority spot metering. This is designed to keep those highlights in check. Evaluative metering may not properly expose the subject.
Minimize Distractions to Keep the Focus on the Subjects
Outdoor weddings are full of wide-open spaces — and sometimes cars in parking lots, power lines, road signs and more. During an outdoor wedding, pay attention to what’s in the background. Noticing that a certain angle makes it look like a decorative lamp post is coming through the bride’s head, for example, will save you a lot of Photoshopping later. Use compositional tools to minimize distractions, such as adjusting your angle or swapping lenses. The subject should be the priority. But looking for ways to minimize distractions in the background can both spark creative ideas and cut down on post-processing time.
Take Wide Shots to Showcase the Atmosphere and Location
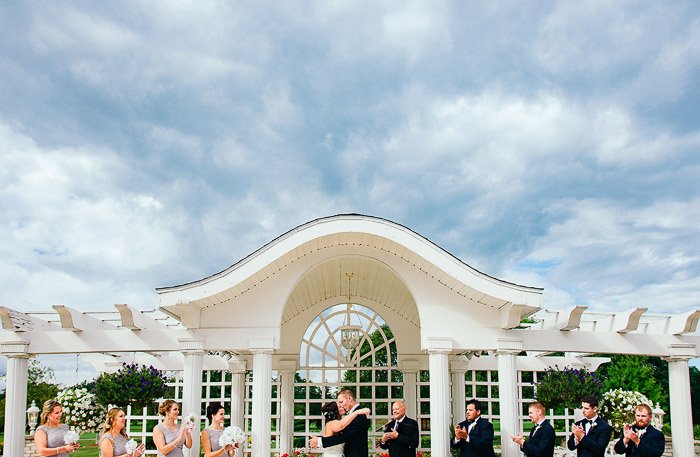
Outdoor wedding venues tend to be beautiful backdrops for those vows. Make sure to capture that beauty. The bride and groom chose that location for a reason. Use a wide-angle lens to capture the entire venue. Mixed with close-ups on the details, the images will tell a better story of the couple’s day. Without the limits of walls, look for creative ways to capture the entire ceremony scene in one shot. A balcony from a nearby building can provide a bird’s eye view. Or backing up can show off the scene in all its glory.
Use a Polarizing Filter to Make the Sky Pop
Outdoor wedding photographers can learn a few tricks from landscape photographers, like using a polarizing filter. Polarizing filters control reflective light. Along with creating neat effects like reflections off water, these inexpensive accessories will also help the sky to pop. With a polarizing filter, the sky looks even bluer than without. Even the greenery of the foliage can sometimes pop more. Because polarizers cut down on light, you won’t want to use one at the end of the day or indoors. But this simple accessory can make the sky during the outdoor wedding look much more dramatic.
Photograph Formals in a Shady Area or Backlit By the Sun
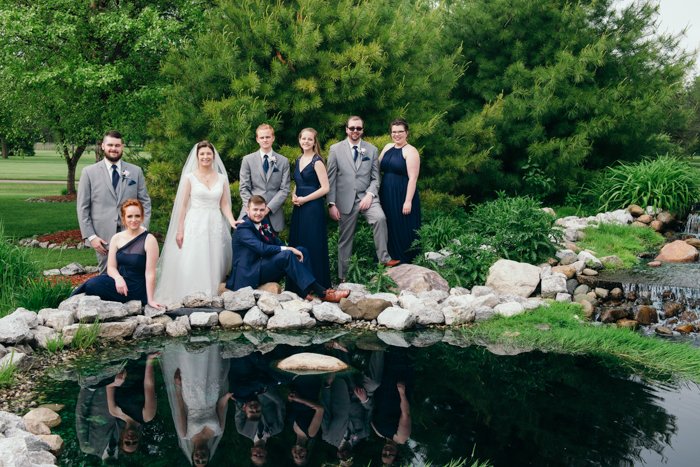
While you can’t change the location of the ceremony (besides offering tips and insight during the planning process), formals are more flexible. When it comes to the formals portion of the day, prioritize the light. Look for a shady area, or if it’s later in the day, a spot that’s backlit by the sun. The family photos, images of the bridal party, and portraits of the couple will look best when lit best. I love outdoor weddings because family portraits tend to look better outdoors in a well-lit location over dim indoor locations. My go-to setup is to arrange the pose either backlit or in the shade. I use an off-camera flash to add catchlights in the eyes, more contrast, or more dramatic lighting effects.
Take Night Portraits of the Couple for Creative Photos
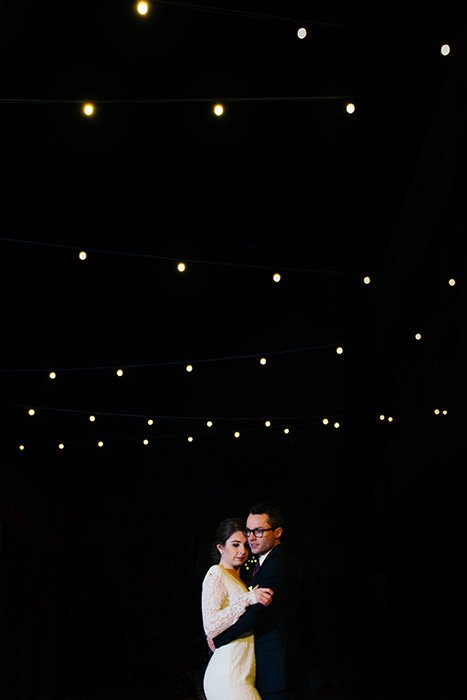
Most outdoor wedding photos are snapped during the day — and for good reason. It’s the easiest time to get great shots. But what about night photography at the end of the wedding day? Pulling the couple aside for a few quick photos outside at the end of the day can result in some dramatic images. For night photography, you’ll want either an off-camera flash or a video light. Both will work well. Video lights aren’t as powerful, but are easier to use for beginners, affordable. And they will help the camera autofocus in the dark as well. Besides just lighting the subject, look for lights in the background, otherwise you will just end up with the couple on a black background. Look for lights in the surrounding scene. These can be the lights from the venue, the lights from a city skyline, or string lights, to add interest to the background.
Take Rainy Photos to Tell the Story of the Wedding Day
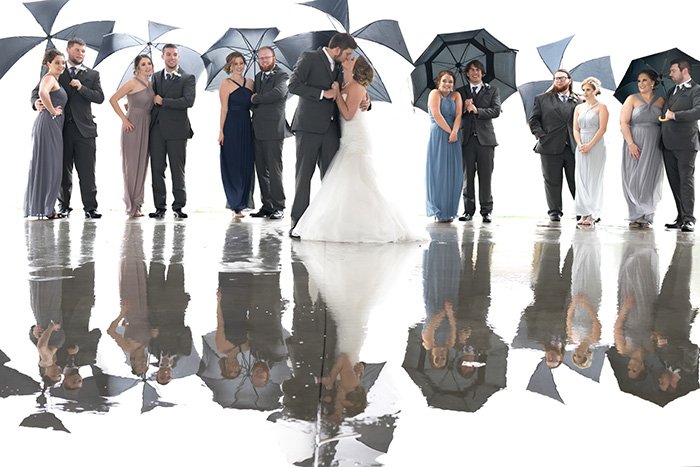
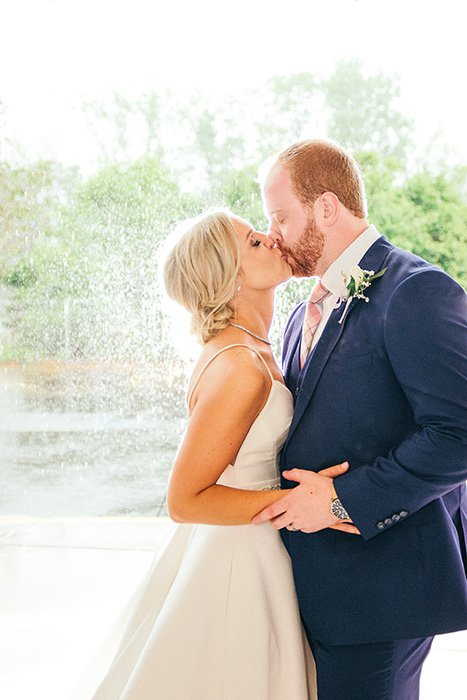
But what if it rains? Rain is often a major concern for brides and grooms, especially for outdoor weddings. The couple should plan for an alternative location for the ceremony to keep guests dry. But a rainy wedding day doesn’t have to mean 100 percent of the photos are snapped indoors. With proper preparation, wedding pictures in the rain tell the story of the day. And they are often even more creative than the traditional wedding shots. First, check with the couple to see if outdoor photos in the rain are still an option. I let my couples know ahead of time that rainy day photos are fun and creative. But I do warn the bride that her hair may frizz a little from the moisture in the air and the bottom of her dress may get a little wet and dirty. While I encourage outdoor photos in the rain, I won’t force a bride in an expensive dress to go outside. Second, make sure you are prepared to keep your gear dry and functioning for the remainder of the wedding! A simple camera rain cover is a huge help. I slide one over my camera and one over my off-camera flash. You can pick up a pair of inexpensive camera rain sleeves. Look for a way to keep the bridal party as dry as possible. Look for a back-up location for the formals that has a large pavilion or other covered areas to help keep everyone dry. The image above was shot in the parking lot with a covered drive at the front of the reception venue. Another option is to provide matching umbrellas for the entire wedding party. Keep your eye out for sales on umbrellas, particularly large ones that will match any wedding decor, like plain black or transparent. Finally, make the rain a positive feature in the photo, rather than a negative. If you place an off-camera flash behind the couple and use a fast shutter speed, those raindrops will sparkle. Rainy weddings are also great opportunities to look for reflections to use in the shot.
Conclusion
The key to successful outdoor wedding photography is preparation mixed with a bit of understanding on how to best tackle the different challenges that come with them. By preparing your clients, yourself and your gear, and understanding how to best adjust the camera settings and lighting, you’ll be able to capture stunning, memorable images for the bride and groom.


